Sewing Pattern
Pastel Prints Vintage Cushions
Home makes Vintage
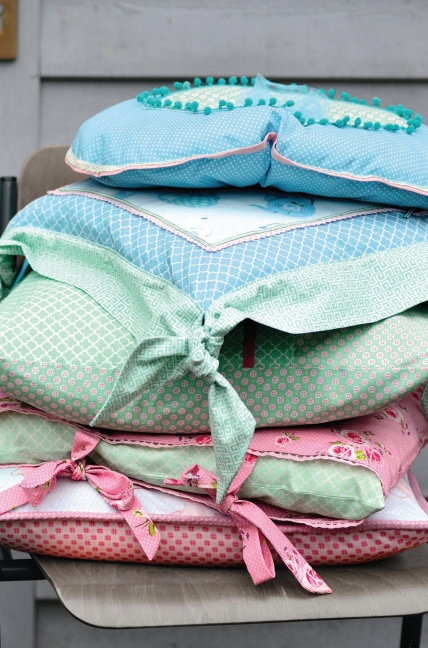
These coordinating cushions in nostalgic prints are ideal for piling onto a comfy sofa to sink into with a good book or your latest sewing project. Made using Gütermann’s Ring a Roses Summer Loft range of 100% cotton fabrics, the geometric and floral designs in spring-fresh pastels are sure to lift any room.
Essentials
- **Oval cushion**
- Fabric: Ring a Roses by G?termann, Summer Loft range, Polka dot, blue, 40cm; Shamrock, pink and green, 20cm; Teapot, blue, scrap; netting, light blue, 12cm x 40cm
- Thread, sew-all, coordinating
- Bias binding, pink, 130cm Lace, bobbin, light green, 1cm wide, 130cm
- Trim, pom pom, jade green, 80cm
- Button: cover, 4cm; small, shirt
- Fibre filling
- Fusible webbing
- **Knotted cushion**
- Fabric: Ring a Roses by G?termann, Summer Loft range, Ornament, blue, 40cm; Teapot, blue, 30cm;
- Meander, green, 70cm
- Thread, sew-all, coordinating
- Ribbon, satin, light green, 5mm wide, 150cm
- Lace, bobbin, pale pink,
- 1.5cm wide, 120cm
- Interfacing, fusible, 30cm x 90cm
- Cushion pad, 30cm square
- **Rose cushion**
- Fabric: Ring a Roses by G?termann, Summer Loft range, Rose, pink and white, 55cm; Ornament, green, 55cm
- Thread, sew-all, coordinating
- Bias binding, pale pink, 110cm
- Lace, bobbin, pale pink,
- 1cm wide, 110cm
- Fibre filling
Dimensions List
- **Oval cushion**
- 36cm x 48cm
- **Knotted cushion**
- 50cm square
- **Rose cushion**
- 50cm square
Sew an oval cushion
Download the templates and print out. Use folded paper to draw two full oval shapes: one outer, one inner. Use the outer oval template to cut two shapes from blue Polka dot fabric, adding a 1cm seam allowance. Use the inner oval template to cut one piece from Shamrock material.
Iron fusible webbing onto the wrong side of the inner oval. Neaten the edges with zig zag or overlock stitch. Pin it to the centre of the outer cushion with pom pom ribbon over the edge; topstitch to secure them into place.
Lay the front and back of the cushion wrong sides facing and stitch together with a 1cm seam allowance, leaving 10cm open for turning. Turn out and stuff loosely. Sew the gap closed.
Unfold bias binding and pin it right sides facing on the outer edges of the oval. Stitch securely along the crease all the way around. Then fold the binding over to the other side, enclosing the cushion edge, pin and sew. Pin bobbin lace over the seam and stitch in place.
Cover a button with teapot fabric according to the manufacturer’s instructions. Fold strips of net lace in half lengthways, gather the open edges with hand stitches and draw them tightly together. Knot the threads. Stitch the net lace in the centre of the cushion by hand. Place the covered button on top in the centre, and sew it securely in place with a small button as a stay button on the back of the cushion, through all the layers.
Make a knotted cushion
For the cushion front, cut a 37cm square from blue Ornament fabric. Cut two 31cm x 37cm pieces for the back. Cut a 27cm square from blue Teapot fabric and iron fusible interfacing to the reverse. Neaten the edges with overlock or zig zag stitch. Topstitch the outlines of the teapots with straight stitch. Pin the piece with the teapots centrally on the cushion front and sew all around, 5mm from the edge.
Lay pale pink lace along the edge of the teapot centre piece and pin so that it hides the edge beneath. Place the lace in small folds at the corners. Pin satin ribbon over the top of the lace edge, starting from the lower right corner, leaving the ends projecting an equal distance. Make sure the corners slant by folding the ribbon at a 45 angle around the corner. Secure the satin ribbon and lace with a topstitch. Tie the satin ribbon in a bow, cutting off the ends to equal lengths.
On each long edge of the cushion backs, press a 1cm hem and stitch down close to the edge. Pin the back pieces right side facing to the front with raw edges aligned. Stitch all around with a 1cm seam, allowance. Press, then turn the cushion to the right side through the closure. Ease the edges into shape and press.
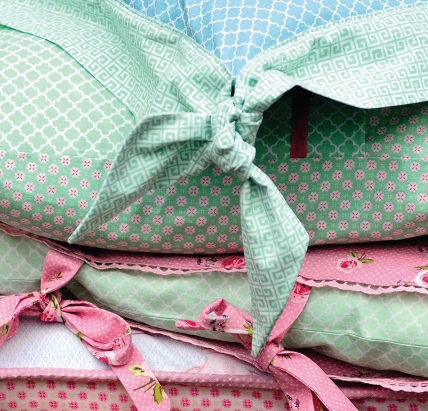
For the ties, cut four 18cm x 92cm strips from green Meander fabric. Fold them in half lengthways, right sides together, and mark a 45 angle at each end. Stitch the ties starting from the centre of the long edges leaving a 6cm gap for turning. Trim seam allowances and clip the corners. Press and turn out.
Pin the ties 5mm from the outer edges of the cushion from corner to corner and tack, leaving the ends projecting at equal lengths. Stitch on the right side, at the same time sewing the turning gap closed. Loosely knot the ties at the corners.
Create a rose cushion
For the outer cushion cut 52cm x 104cm of Rose fabric. From green Ornament fabric, cut 52cm x 102cm for the inner. Cut four ties each measuring 6cm x 42cm. Fold the ties in half lengthways right sides facing and stitch 1cm along the long edge, sewing one end to taper at an angle. Trim the seam allowances and clip the corners at an angle. Turn out and press.
Pin the ties onto the right side of the cushion outer short edges, 16cm down from the corners. Unfold bias binding and pin it right side down over the ties and stitch in the fold along the seam line. Then lay the bias binding, with the seam allowance folded in, around the edge and pin. Iron, then stitch on the right side close to the edge.
Fold the short sides with the bias binding to a width of 3.5cm on the wrong side and press. Slide bobbin lace beneath the ironed edge and stitch securing the lace and the ties to the fold.
Fold the cushion cover in half right sides together and stitch 1cm from the side edges. Turn out and press. Next, fold the inner cushion piece in half widthways with right sides together, stitch all around 1cm from the edges, leaving a 10cm gap for turning. Press and turn out. Stuff with fibre filling and sew the gap closed. Place the cushion in the cover and secure the ties.


