Sewing Pattern
Sashiko Tableware
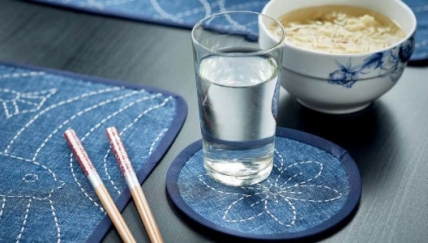
Coasters Home makes Table runners
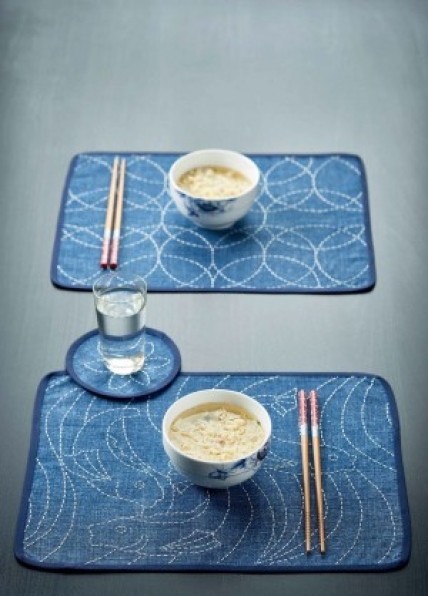
Sashiko is a traditional Japanese style of embroidery. The word means little stabs, referring to the nature of the running stitch used. Designs are often inspired by nature – waves, ripples on the surface of water, and clouds, for example, and from repeating geometric patterns, particularly circles, stars and fan shapes. Traditional sashiko needles are similar to those used for crewel work. Running stitch has got to be the easiest of all embroidery stitches, so this is the perfect project for a beginner – you can find step-by-step instructions for this technique here. Create a whole new set of placemats and coasters to wow at your next dinner party.
Essentials
- Dark blue linen
- Cotton backing fabric (optional)
- Bias binding, 12mm wide
- Coordinating thread
- White perle cotton
- Tailor’s chalk or chalk pencil
- Crewel embroidery needle
Dimensions List
- Table mats: 21cm x 31cm
- Coasters: 11cm diameter
Stitch a tableware set
1 Download the designs. Using tailor’s chalk or a chalk pencil, mark out a 20cm x 30cm rectangle on linen fabric for each placemat. Draw around a circular object with a 10cm diameter, such as a cup or glass, for each coaster.
2 Transfer the design onto the fabric, within the marked lines. Thread a needle with white perle embroidery thread and, beginning anywhere on the design, follow the lines, working a running stitch.
3 Work several stitches at a time, pushing the needle in and out of the fabric along the marked lines, and pulling gently, so that the thread lies flat. Do not pull too tightly, or the stitches will cause the fabric to pucker.
4 Cut out the shapes along the outlines. If you wish to add a fabric backing, cut this at the same time, to exactly the same dimensions. Stitch the two layers of fabric, wrong sides together, 3mm from the edge. Bind the raw edge with bias binding, folding under the short raw edges and slip stitching in place. Press lightly on the reverse.


