Sewing Pattern
Upcycled T-Shirt Ideas Part Two
Dresses Garments
If you are making the dress, you can assess this quickly and easily by pinching it at the top of the shoulders and holding it up to yourself. It should be wide enough to get over your hips, and a suitable length. The asymmetric top can be made from a t-shirt that is already a snug fit.
Essentials
- T-shirts, one fitted (for asymmetric top); one large (for dress)
- Stretch lace, wide, 3m
- Dressmaker's scissors
- Tailor's chalk
Dimensions List
- This is a custom sized project. Our guide refers to sizes 8-16.
- Before beginning, take the following measurements (see page 3 of the Sew Essentials Pull-Out Workbook for measuring tips) and note them down.
- Divide each measurement in half to make measuring your T-shirt easier when laid flat.
- Bust: ____
- Waist: ____
- Hips at widest point: ____
- Shoulder to bust: ____
- Bust to waist: ____
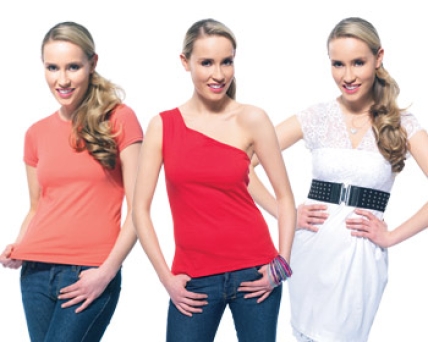
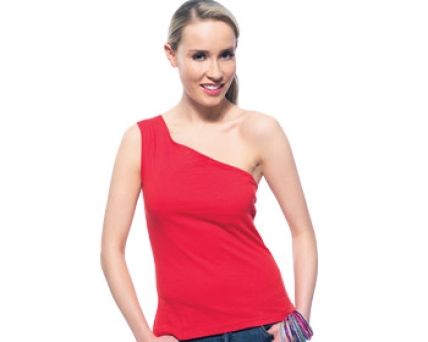
Create a stylish asymmetric top
First, make sure that your T-shirt is adequately proportioned to accommodate the transformation to a fitted top (see Sew smart). Turn it inside out so that you can clearly see where all the existing seamlines are. All chalk marks will be made directly onto the wrong side of the garment. Note: you will be cutting through both layers – front and back – at once.
Remove one sleeve and the neckline. To do this, lay the T-shirt flat, smoothing out any creases. Carefully snip off the neckline first, then make a decision as to which side the asymmetric shoulder strap is going to sit. Cut off that sleeve, along with the attaching armpit seam, as close to the join as possible.
With dressmaker’s chalk, mark out the asymmetric neckline. Draw an arc that swoops from the upper neckline on the strap side (going across the upper torso) and ends just underneath the armpit on the opposite side. Cut along this line with dressmaker’s scissors to remove the second sleeve and create the asymmetric neckline.
Check the fit against your measurements, and prepare for any necessary adjustments to the side seams. If you want the finished garment to be fitted (and have chosen to work with a wellfitting T-shirt), you may not need to adjust the side seams at all. However, if you are working with larger size, each side seam will need to be taken in to fit.
Draw a figure-grid onto the T-shirt. To do this, fold it in half and mark a vertical line along the fold to mark the centre. Draw your noted shoulder-to-bust measurement onto the shirt (measuring down from the top of the garment) with a horizontal chalk stroke. Measure the bustto- waist measurement down from this point and mark with another horizontal line. This has created a basic figure-grid: one vertical line marking the centre and two horizontal lines – bustline and waistline. For longer garments, the hipline can also be added.
Mark the bust measurement onto the shirt. Add 3cm for total side seam allowances (1.5cm each side) to your halved bust measurement and hold a tape measure out to this length. Fold the measurement in half, placing the fold point at the centre line marked on the T-shirt, and chalk the ‘end’ points on either side. Repeat for the waist (and hips if applicable).
Using the chalk, smoothly join up the ‘end’ points of the bust and waist lines down both sides. Once you have contoured the shape, pin carefully through both layers and cut. There should now be two identical body pieces, front and back, ready to stitch together. Keep the pins in place ready for the next step.
Join the front and back pieces. Using a straight machine stitch and starting at the base of the garment, work up one of the side seams towards the armhole, leaving a 1.5cm seam allowance. Repeat for the second side. The bottom of the shirt should not need hemming – unless you have shortened the garment. If you have, stitch the hem now.
Turn the shirt right sides out and try it on. Do this as often and as early into the project as possible, to make sure any adjustments can be fully addressed For example; the shoulder strap may need shortening. If it does, turn the top wrong sides out, and reposition the top edge using pins. Machine stitch the new shoulder line.
Hem the armhole and the neckline. Once all required adjustments are complete, fold 5mm to the wrong side all around the neckline and press. Repeat to create a double hem. Pin into place then secure with a machine stitch. Repeat the process for the armhole. Press all seams to finish.
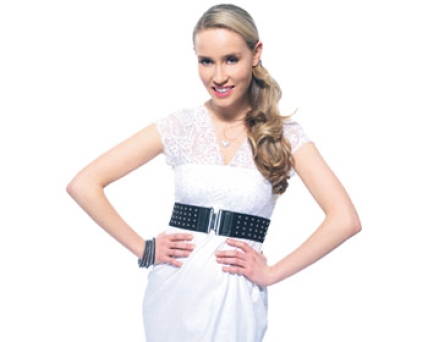
Work up a pretty sundress
Having made sure that the T-shirt is adequately proportioned to accommodate the transformation, turn it inside out so that you can clearly see where all of the existing seamlines are. All chalk marks will be made directly onto the wrong side of the garment. Note: you will be cutting through both layers - front and back – at once.
Remove the sleeves and neckline. Lay the T-shirt flat, smoothing out any creases, and using a pair of sharp dressmaker’s scissors cut off the sleeves and the attaching seams as close to the join as possible. Cut off the neck in a horizontal line from shoulder to shoulder, leaving a rough rectangular shape. Trim off any awkward angles so that the shape curves smoothly towards the new top edge.
Extend the original side seams up to the top of the dress. Pin the open side seams together on both sides and try the garment on (inside out) to see how it fits. Once satisfied, place the fabric on your sewing machine so that the needle is positioned at the point where the existing seam ends and the open edge begins.
Work a small line of straight machine stitch along the edge of the original side seam, then work backwards for a few stitches to anchor the seam. Stitch forward again, extending the seam line to the top of the garment, to close each side seam. Work a few more reverse stitches at the opposite end to finish.
Hem the top of the garment. Fold 1.5cm over to the wrong side along the top edge and press. Fold it over by another 1.5cm, to create a neat self-encased hem. Work a line of machine stitch around this top edge to secure. This should leave a finished channel of fabric around the edge, which the lace shoulders will be attached to.
Attach the lace hem to the bottom edge. Measure the bottom circumference of the dress and add 3cm to this number. Cut a length of lace to this measurement and pin it into position on the right side of the garment (starting from one side seam and working all the way around) overlapping the original hem. Once pinned, machine stitch into place.
Cut the lace bust panel. Take your whole bust measurement (do not halve it for this part of the project) and add 3cm for seam allowance. Cut a piece of stretch lace to 5cm less than this measurement – it needs to be smaller to hug your figure, and keep the dress up. Check that it will fit appropriately by holding it up to yourself and pinning. With right sides facing, line the lace up end to end and sew to join, creating a circle.
Position the lace bust panel. Line up the join in the lace with one of the side seams of the dress, and place it over the top of the bust, placed so that the edge of the lace overlaps the edge of the garment to create a scalloped edge. Instantly the contained dress will form natural gathers. Keep these in place by pinning evenly.
Sew the panel into position. To stitch the gathers evenly and allow for the elasticated nature of the lace, stretch the banding as you work. Let the pins guide you, and remove them as you join. Take the trim between your hands and gently stretch, allowing your sewing machine to feed the fabric as evenly as possible.
Work around the top edge of the lace, trying not to let the fabric pull too fast through your machine – and making sure to work at a slow and steady pace. Secure the bottom edge of the panel. Pin around the middle of the lace so it doesn’t ride up, then work another line of stitching around the bottom of the band to secure it and stop it from rolling up.
Calculate the shoulder pieces. The width of the lace makes a shallow cap sleeve, created by sewing two pieces of stretch lace from the front to the back of the dress at a slight outward angle. The best way to position the shoulder pieces is to try the dress on. Measure over your shoulder from underarm to underarm, and from central chest to centre back.
Add 3cm to each piece to allow for seam allowances. These finished measurements will define the length and the shape of your shoulder pieces. Ensure that both are symmetrical by cutting the lace to the longer measurement, pinning into position on the dress, and trimming to fit. Make sure that both straps are pinned to the wrong side of the dress and machine stitch, removing the pins as you go.


