Sewing Pattern
Teacher’s Notebook and Pencil Pouch
Gifts Pencil cases
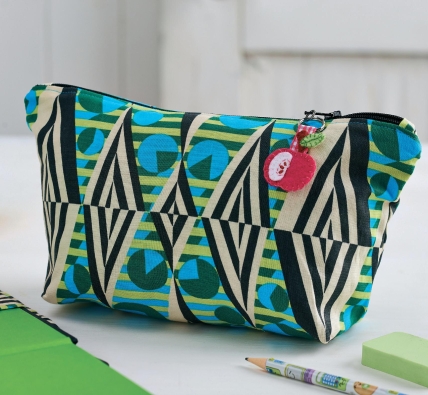
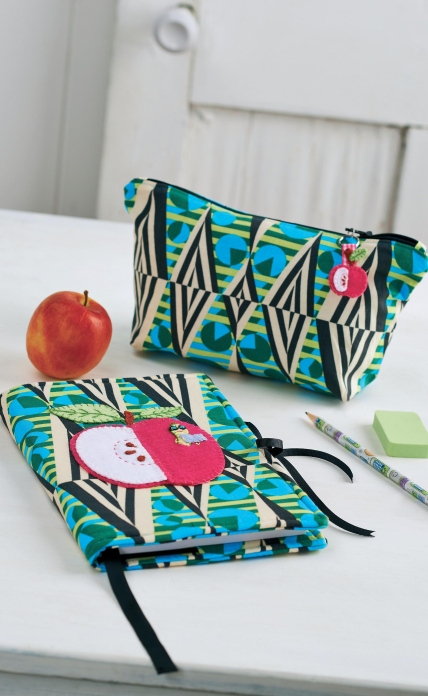
These fun presents are ideal for a special teacher. Put a smile on their face with a handmade gift that thought and effort has gone into. The notebook cover is appliquéd with a traditional apple, complete with bookworm! Pair with a matching pencil pouch, which can easily be used for make-up or toiletries too. These simple projects are perfect for making with kids, so why not take the opportunity to introduce them to sewing?
Essentials
- Fabric: printed; lining
- Felt: pink; white; green; yellow; purple; brown
- Interfacing, fusible, lightweight
- Wadding
- Ribbon: black, 1cm x 56cm; 5cm x 35cm;
- gingham, scrap
- Thread: sewing; embroidery, coordinating
- Zip
- Key rings, two
- Notebook, A5
- Craft knife
Dimensions List
- Notebook cover: 23cm x 33cm
- Pencil pouch: 14cm x 25cm
Sew a notebook cover
Cut out two 25cm x 35cm rectangles from printed fabric to make a front and back, and one from wadding. Then, cut two 10cm x 25cm rectangles with the long side on the fold to make sleeves.
Download the templates and print. Cut out the whole apple shape in pink felt, then the smaller apple half from white and the bigger one from pink. Cut out the leaves in green felt, the stalk and pips in brown, the worm in yellow and his book in purple. Using a craft knife, make a small slit in the pink apple half and slide the end of the worm through.
Lay the back piece of the notebook cover right side up and place the wadding on top. Position the folded sleeves, right sides out, on top of the wadding, with the cut edges aligned to the sides of the back piece and the folded edge pointing towards the centre. Pin. Cut a 5cm x 35cm length of black ribbon and turn one end under twice. Align to the top edge of the back piece as a bookmark, just off centre. Lay across the wadding and pin.
Cut a 1cm x 56cm piece of black ribbon in half. Centre one piece on either side of the back section as ties, aligning to the side edge so that they lay across the wadding, and pin. Place the front piece on top, right side down. Pin everything securely, and sew all the way around the edge, leaving a 10cm gap along the bottom. Snip the corners close to the stitch line, turn right side out and press. Fold in the edges of the opening and close by topstitching around the book cover.
Position the whole apple piece onto the centre of the front cover. Place the stem on top, slipping its base under the apple. Put the pink half with the worm in on top of the apple on the right-hand side, and the white half on the left. Pin and sew along the edges using blanket stitch and two strands of matching embroidery thread, making sure not to sew through the sleeves behind.
Position the leaves next to the stalk and blanket stitch around them. Stem stitch down the centre to create veins and continue to make a stem running to the stalk. Pin apple pips in place on the white apple half and blanket stitch around them. Use running stitch and one strand of embroidery thread to add a semi-circle around the pips. Place the book piece on the worm and blanket stitch around both the worm and his book using two strands of coordinating embroidery thread. Use stem stitch to add arms, a smile, glasses and hair. Make two French knots for eyes.
Make a pencil pouch
Cut out two 19cm x 27cm rectangles from printed fabric, two from lining and two from fusible interfacing. Cut a 4cm square out of each of the bottom corners. Trim two 4cm x 10cm rectangles from printed fabric to make tabs.
Turn the short tab edges under by 1cm, then fold the tabs in half and press. Encase each end of a zip inside a tab, leaving 22cm of zip showing between the inside edges of the tabs. Cut the end of the zip to fit. Attach the tabs to the zip ends, sewing slowly over the zip, 5mm from the tab’s edge.
Following the manufacturer’s instructions, iron interfacing to the backs of the two lining pieces. Place one piece interfacing-side down, and lay the zip on top, face up. Align the top edges of the zip and the fabric, so the inside edges of the tabs are 2.5cm from the side edges of the fabric.
Place the outside fabric right side down on top of the zip, so that all the top edges are aligned. Pin and tack, then repeat with the other side of the zip. Machine stitch each side of the zip using a zipper foot. Trim the tabs so they align with the edges of the fabric. Open out the pouch so the zip is facing upwards. Press the edges of the fabric you’ve just sewn, then topstitch them down.
Making sure the zip is undone, open the pouch so the right sides of the lining are facing, and pin. Push the zipper in on itself towards the lining, aligning the topstitching on each side, and pin. Sew the sides and bottom 1cm from the edges on the lining and main fabric, leaving a 10cm gap in the centre of the bottom of the lining.
Pinch the bottom and side edges of the corner notches together to close the gaps and form a bottom to the pouch. Sew 1cm from the edges, then trim the corners. Turn the pouch right side out through the gap in the lining. Stitch the opening closed, then push the lining into the pouch.
Using the templates provided, cut out two apple pieces from pink felt, one half apple from white, one leaf from green and one stalk from brown. Attach the half apple piece to one of the apples using blanket stitch. Embroider pips using brown thread and a surrounding semi-circle in pink.
Fold a small piece of gingham ribbon in half to form a loop, and pin between the two apple pieces. Sew the stalk and leaf onto the ribbon. Using coordinating thread, blanket stitch around the apple, stitching the front and back together. Slide the ribbon onto a key ring. Attach to a second ring and join onto the zip.


