Sewing Pattern
Vintage Jewellery Necklace
Accessories Jewellery
Reusing treasured items such as brooches, buttons and beads is a great way to add extra meaning to your handmade creations. Combine them with sumptuous silk dupion and pearl beads for a truly luxe finish.
Essentials
- Fabric: silk dupion, peach, 50cm Fusible interfacing: medium weight,
- 50cm Lace trim: scallop-edged, 1m Ribbon: grosgrain, mink and ivory,
- 10mm wide, 16mm wide, 25mm wide, 35mm wide;
- scallop-edged Buttons: vintage glass, a selection Beads: pearl, a selectio
Dimensions List
- 16cm x 19cm (without ties)
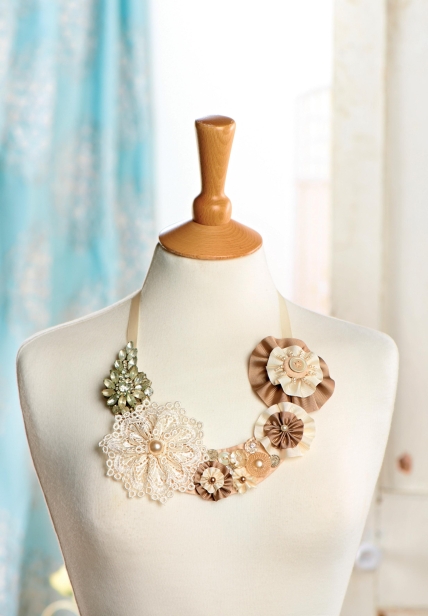
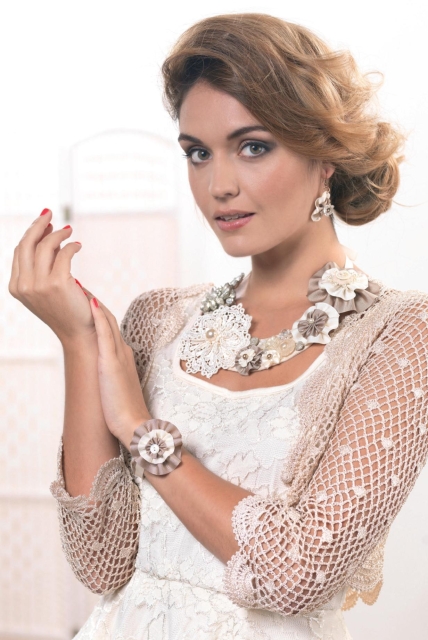
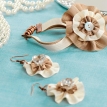
Create a collar necklace
Cut a 20cm x 40cm piece from both silk dupion and interfacing. Iron the interfacing to the wrong side of the silk to secure. Locate the template on page 83 and cut it out, then use it to cut two collar pieces from the backed silk. Place the two collar pieces right sides together and stitch around the curved edges, leaving a 4mm seam allowance. Cut notches into the curves, turn right sides out and press with an iron.
Trim the two raw ends to neaten, push to the inside of the collar and press. Cut vintage necklace two 50cm lengths of ivory 10mm wide grosgrain ribbon and push one end of each into one of the openings. Pin into place, then hand stitch to secure and close the gap.
Gather a 50cm length of scallop-edged lace into a rosette bloom, holding the shape in place with a few hand stitches. Sew a large pearl to the centre of the flower, then stitch it to the collar, positioning it at the centre left of the work. Add an antique brooch to the left of the lace flower with stitches, just covering the join between the silk and the ribbon tie.
Wrap a cover button with a scrap of silk dupion and secure the button back. Sew pearl beads around the edge of the button, working in stacks of varying sizes. Cut a length of 35mm mink grosgrain ribbon and gather using a running stitch. Pull tight to create a flower shape.
Repeat step 4 using a length of ivory 25mm ribbon. Lay one flower on top of the other and secure with a few hand stitches. Add the covered button to the centre of the ribbon flowers, then secure the completed bloom to the collar, positioning it at the right-hand join between the silk and the ribbon tie.
Repeat steps 4 – 5 to create a smaller bloom using lengths of 25mm and 10mm wide mink and ivory ribbon. Sew a pearl to the centre, then add the flower to the collar, next to the lace bloom. Create another using only scallop-edged ribbon, and one more from 25mm and 16mm wide grosgrain ribbons. Attach each of them to the collar, as shown.
Fill the uncovered parts of the collar with a mixture of vintage glass buttons and pearls. Cut the ribbon ties to 45cm. If you’d like to cover your stitch work on the back of the necklace, cut another silk collar piece and stitch or fuse into place.
Make a cuff
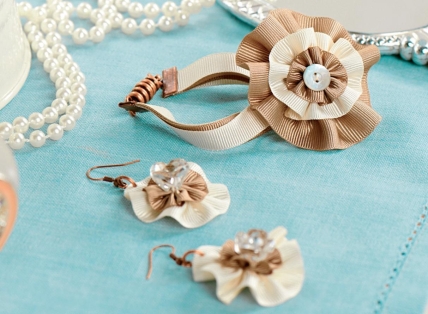
Cut two 16cm lengths of 10mm ivory grosgrain ribbon and two from mink grosgrain ribbon of the same size. Place one of each together. Fold in half and place the trimmed edges into a bronze ribbon end. Squeeze into place to secure, repeat for the other ribbons, then connect the two sides together with a metal link.
Create a flower from lengths of 25mm wide mink ribbon as for the collar necklace. Repeat to create an ivory flower from 16mm wide ribbon, plus another from 10mm wide ribbon. Add a pearl button to the centre of the smallest bloom, then stitch all three flowers together, then to the bracelet. Connect an 8mm jump ring to each ribbon end, then attach a magnetic clasp to finish.
Complete the set with earrings
Create a bloom using 16mm wide ivory grosgrain ribbon. Make one more, from 10mm wide mink ribbon, and stitch on top of the ivory flower. Sew a vintage glass button to the centre.
Using a heated needle, make a hole in the ribbon, thread a jump ring through, then attach an earwire. Repeat to create a pair.


