Sewing Pattern
Young Girl’s Nautical Applique Dress
Children Dresses Garments Girl’s clothing
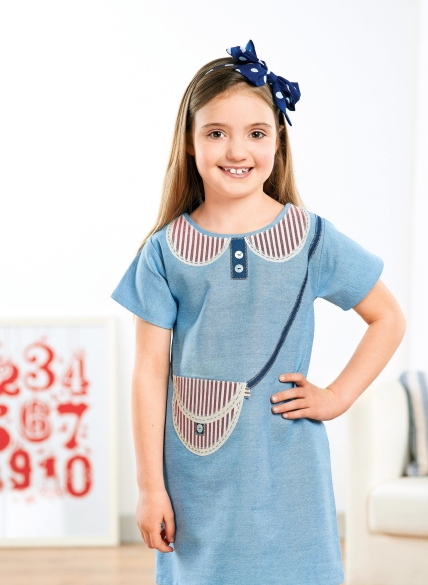
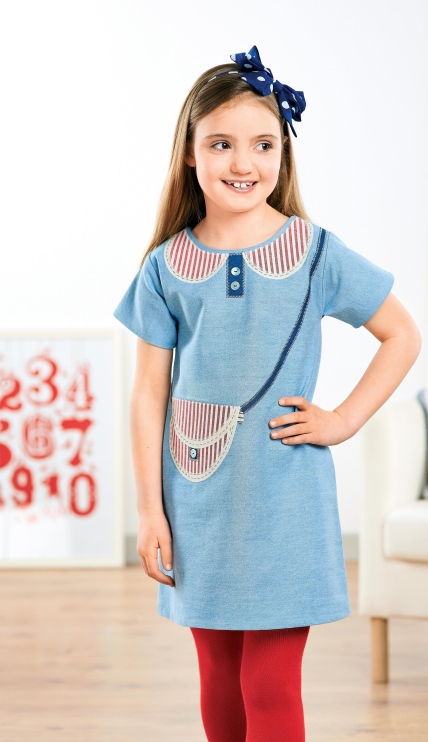
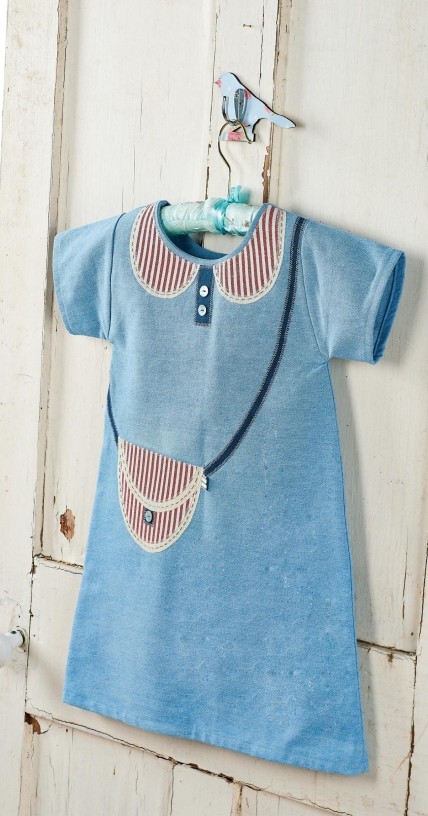
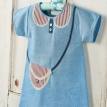
This adorable frock is stitched in a soft blue fabric which has the appearance of light denim and features a fun appliquéd Peter Pan collar and across the body bag. Louise used fabrics with a nautical appeal and has included details like the pretty shell button embellishments that little girls will truly adore.
Essentials
- Fabric: light blue, 100cm x 120cm; striped, red and
- white; navy; beige
- Thread: coordinating; cream; dark blue, thick
- Fusible webbing
- Interfacing, fusible, lightweight
- Ribbon, striped, blue, 1.5cm wide
- Buttons, shell, 1.5cm, three
- Dressmaking paper
Dimensions List
- Ages (5-6), 7-8, (9-10)
- Use a 5mm seam allowance unless otherwise stated
Stitch a nautical dress
On a piece of dressmaking paper, cut a rectangle measuring 50cm x 66cm for age 7-8 (40cm x 62cm, age 5-6; 56cm x 70cm, age 9-10). Measure in 10cm for age 7-8 (6cm, age 5-6; 12cm, age 9-10) from both top corners and draw a line down from these points to the bottom corners. Cut a semi-circle template from cardboard measuring 14.5cm across for age 7-8 and 5-6 (17cm, age 9-10), or adjust the size to fit your child’s head measurement. Place in the centre top of the pattern and draw around the semi-circle.
Measure 5cm for age 7-8 (4cm, age 5-6; 6cm, age 9- 10) down either side of the fabric from the top corners and draw a line from these points back to the top edges of the semi-circle. Measure down 16cm for age 7-8 (14cm, age 5-6; 18cm, age 9-10) from both top corners of the shoulder and draw a slight curve back up to the corners, cut out. Using the dress pattern, cut out two pieces from blue fabric.
Measure 21cm for age 7-8 (19cm, age 5-6; 23cm, age 9-10) up from the bottom of the dress pattern and use this top section as a template to cut out one piece of lightweight interfacing. Iron onto the wrong side of one of the dress pieces. This is your front piece.
Using the dress template as a guide, draw the shape of the neck and shoulders onto another piece of dressmaking paper. Measure 5cm from the neckline and draw a line to run parallel with the shape of the neck. Cut out. Use this pattern to cut two pieces of pale blue fabric for the facings. Pin right sides together to the front and back dress pieces and machine around the neck edge. Clip the curve, turn through and press.
Visit www.sewmag.co.uk and print the templates for this project. Draw the outer collars, inner collars and small rectangle onto fusible webbing, remembering to reverse the template for one side of each collar. Roughly cut out and iron the outer collars onto pale beige fabric, the inner ones onto red stripe material (making sure the stripes are running vertically), and the rectangle onto navy blue.
Cut out and position the blue rectangle in the centre front of the neckline, 5mm from the edge. Set your machine to a medium zig zag stitch and, using cream thread, sew all the way around the edge, being careful not to catch the neck facing in the stitching.
Position the two pale beige sections of the collar so they follow the curve of the neckline 5mm from the edge and iron into place. Machine zig zag around the outer edge of both sections. Iron on the red stripe sections so they line up with the top edge of the beige material. Zig zag stitch around the edges.
Using the template, draw all the pieces for the bag onto fusible webbing. Roughly cut out and iron the two outer bag sections onto beige fabric, the two inner sections onto red stripe material and the rectangle onto navy blue.
Position the largest beige bag section onto the dress 30cm down from the shoulder and 5.5cm in from the side at a slight angle (or alter this depending on the height of the child). Cut 4cm of blue stripe ribbon, double over and place underneath the purse section 5mm down on the right-hand side with 1cm still showing. Iron into place.
Using the position of the bag, make a template for the straps, drawing them onto the paper dress pattern and remembering to reverse them before drawing onto fusible webbing. Iron onto navy blue fabric.
Position the red stripe section, blue rectangle and straps, and iron them into place. Then zig zag stitch around both curved edges of the bag, the sides and bottom edge of the navy blue rectangle. Set your machine to a slightly narrower zig zag and machine down the sides of both the strap sections.
Iron the top sections of the bag into place, lining up the top edges and with the machine set back to a wider zig zag setting. Stitch around the edges. Using dark blue thick thread, work a single line of running stitch in the beige sections parallel with the curve on both the bag and collar. Sew two buttons onto the blue rectangle around the neck and one onto the bag.
Open out the neck lining and pin both the front and back pieces of the dress right sides together at the shoulders, matching the seams. Sew together, then trim the seam and press open.
To make the pattern for the sleeve, draw a rectangle measuring 15cm x 32cm for age 7-8 (14cm x 28cm, age 5-6; 16cm x 36cm, age 9-10) onto dressmaking paper. The longest sides are top and bottom. Measure in 1.5cm from both bottom corners and 8.5cm up. Draw a line and cut. Fold the paper in half and draw a curve from the 8.5cm mark to the top centre fold. Cut and open out.
Use the template to cut out two sleeves, then pin right sides together to the dress. Stitch in place, trim and clip the seams, then press the seam down towards the sleeve. With the dress inside out and matching the underarm seams together, pin the dress down both sides and stitch. Clip the seam under the arms and press open.
16.. Turn the sleeve hems under by 5mm, then again by 1cm. Pin, tack, stitch and press. Turn the bottom hem up by 1cm, then another 1.5cm. Pin, tack, stitch and press.


