Sewing Pattern
Embroidered Covered Notebook
Bookcovers
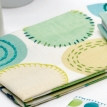
Stitch up protective cases for all your important lists and a little pouch so you'll never be left digging around for your pen again. This simple project is great for practising hand embroidery techniques and uses rectangular fabric panels so there's no tricky cutting involved. Choose a bold graphic print which you can use as a base for striking stitches. We've echoed the circle print with hand embroidery.
Essentials
- Fabric: furnishing cotton, disc print, mint
- Interfacing, woven, iron-on
- Embroidery threads, stranded cotton, green, blue, lemon, variegated green
- Sequins, blue, aqua
- Buttons, 15mm, green, two
- Ribbon: 6mm wide satin, 50cm, lime; 3.5cm wide, 45cm, dotty
- Press fastener, clear
- Embroidery hoop
Dimensions List
- Notebook: 13cm x 15cm (fits spiral bound A6)
- Photo Album: 12cm x 18.5cm (fits 10cm x 15cm 24 pocket album)
- Pen Case: 3.5cm x 14cm (fits a 13.5cm pen)
Notebook Cover
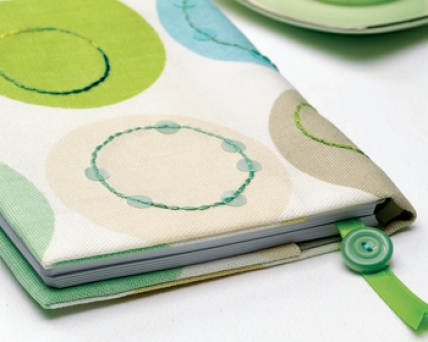
Cut the fabric to 19cm x 48cm, taking the print into consideration. Use a sewing machine to work a zig zag stitch around the edges to prevent fraying. Using tailor’s chalk, draw around a circular item such as an eggcup to mark a sphere within the first printed circle that will be on the outside of the album. Secure a small embroidery hoop centred over the marked circle.
Thread a needle with a length of all six strands of co-ordinating stranded embroidery thread and tie a knot in the end. Draw the needle through the work on the line marked, from back to front and up through the centre of a sequin. Pass the needle back through the fabric on the right of the sequin, on the marked line just beyond the edge of the sequin. Bring the needle up on the line just beyond the left edge of the sequin. Form a back stitch by passing the needle back through the centre of the sequin.
Continue working in back stitch around the circle marked, adding sequins in random positions. Draw different sized circles within adjacent printed shapes, and work in back stitch within each one using different coloured embroidery threads, adding sequins on alternate motifs, moving the hoop as you work. Press the piece on the reverse.
To make up the cover, press a 1.5cm turning towards the wrong side on each short edge. Straight machine stitch each in place to make a hem, then press. Lay the fabric right side up and fold each short edge in by 9cm. Pin, then use the machine to straight stitch along the top and bottom edges, 2cm in from the edge. Repeat on the opposite side, turn through, pushing out the corners carefully.
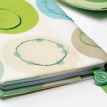
Slide the notebook covers into the front and back slipcover pockets. Knot a length of 6mm lime satin ribbon to the top of the spiral binding and pass the ends between the notebook pages. Trim the ribbon 7cm below the lower edge of the notebook. Stitch a button onto the tails as shown.
Album cover
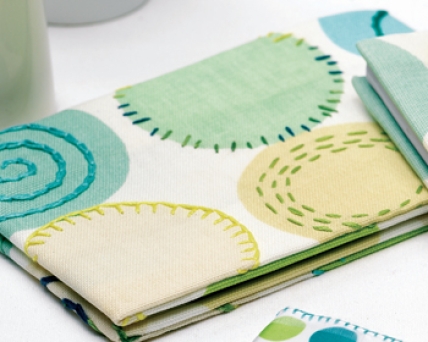
Trim printed fabric to 19cm x 68cm, taking the print into consideration. Work a zig zag stitch around the edges to prevent fraying. Draw different-sized circles onto the printed discs which will be on the outside of the album.
Work the circles in a variety of embroidery stitches including back stitch, running stitch, chain and blanket stitch using different coloured embroidery threads. Use some to outline the printed circles and others to fill them with spirals or concentric circles.
To make up the cover, press a 1.5cm fold towards the wrong side on each short edge. Machine straight stitch each in place to make a hem, then press. Lay the fabric right side up and fold each short edge in by 13.5cm. Pin, then straight stitch along the top and bottom edges, 3.5cm in from the edge. Repeat on the opposite side then turn through, pushing out the corners carefully. Slide the album covers into the front and back slipcover pockets.
Pen Case
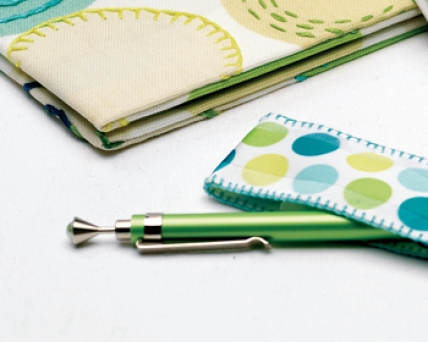
Cut a 43cm length of 3.5cm wide ribbon. Trim 43cm of woven fusible interfacing into a strip slightly narrower, then iron it onto the wrong side of the ribbon. Lay the ribbon face down on an ironing board and fold the right-hand end in 20cm, pressing in place. This will ensure that the printed side of the ribbon will be visible inside the pouch.
To make the pen pocket, fold the left end in 5cm and press, then 12cm and press again. Place a pen between the folded layers on the left, securing it with the clip. To establish the correct position for the press fastener fold the right end in to cover the pen, as though the case were closed.
Make a mark with tailor’s chalk where the fastener should be positioned. Sew the stud in place on the front of the pocket. Pin the folded ribbon in place then work a small blanket stitch up the both edges of the pouch.
Place the pen inside the pouch, fold over the flap and establish the position of the remaining half of the fastener, then stitch it in place on the inside of the flap, sewing a button onto the outside of the pouch for decoration.


