Sewing Pattern
Breton Dress Waist Synching Belt and Casual Tunics
Dresses Garments
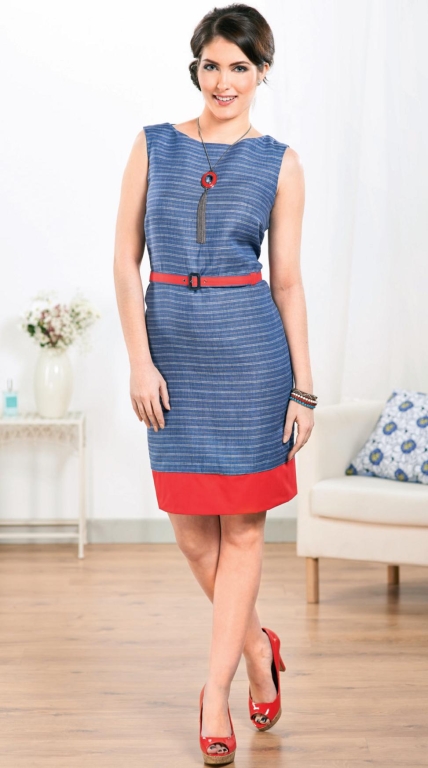
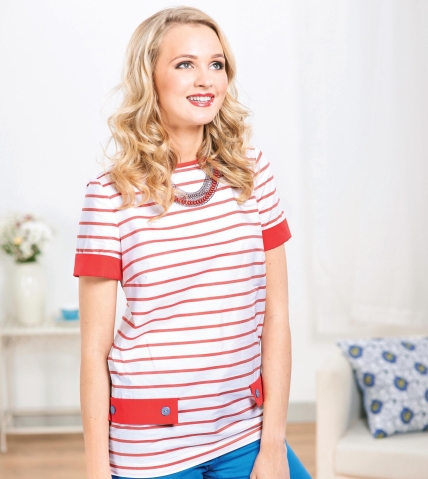
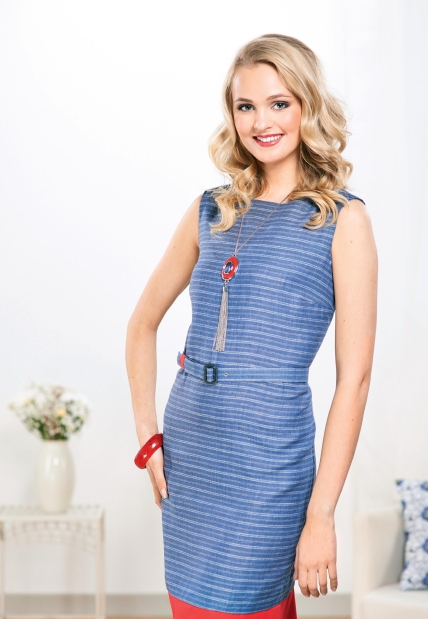
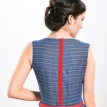
This stunning pattern collection designed by Amanda Walker comprises an on-trend breton dress in striped linen with red accents including a waist synching belt, plus two styles of casual tunic. The first top features short sleeves and a bold red stripe with coordinating facing and button-embellished patch pockets, while the three quarter length sleeve variation boasts a patch pocket and pretty gingham facing.
Essentials
- **Stitch a linen dress**
- Fabric: linen, blue striped, 1.3m x 150cm wide; cotton, red, 50cm
- Zip, contrasting
- Buckle
- Ribbon, red
- Buckram, curtain, adhesive
- Eyelets
- Thread, matching
- **To make a tunic top**
- Fabric, cotton: red or blue striped, 1.3m x 150cm wide; contrasting, 50cm, for cuff facings
- Interfacing, fusible, lightweight
- Bias binding, contrasting, 4cm wide
- Zip, contrasting
- Thread, matching
- Buttons,blue, four or metallic, two
Cutting Guide
- **Stitch a linen dress**
- Front dress: cut one on fold
- Front facing: cut one on fold
- Back dress: cut one pair
- Back facing: cut one pair
- Contrast hem panel: cut a strip 23cm x the circumference of the hem
- 1.5cm seam allowances are used throughout.
- **To make a tunic top**
- Front tunic: cut one on fold
- Back tunic: cut one pair
- Sleeve: cut one pair
- Cuff facings: cut one pair in contrast fabric
- Pocket flaps (for short sleeved tunic): contrast fabric, cut two; interfacing, cut two
- Pocket (for three quarter length sleeved tunic): cut one
- Contrast hem panels: cut a strip 17cm x the circumference of the hem
- 1.5cm seam allowances are used throughout except on pocket and pocket flaps where a 1cm seam allowance is used.
Dimensions List
- Sizes 8-10, 12-14
Stitch a linen dress
Download the pattern pieces at www.sewmag.co.uk, print. and piece together the pattern, then use to cut the pieces from fabric. Mark the dots at the points of the darts on the front piece of the dress; match the notches at the ends, pin, then stitch the darts. Press the resulting flaps towards the top of the piece.
Match the shoulder seams of the front and back pieces together, pin, then stitch. Sew the shoulder seams of the front and back facing in the same manner. Press the seams open. With right sides facing, match together the facing and the neck of the dress, connecting the shoulder seams. Pin, then stitch around the neck. Trim and clip around the curve of the neckline.
Under-stitch the neckline by laying the facing away from the dress, press the seam allowance towards the facing, then stitch on the facing side, close to the seam through both layers. Turn the facing back to the wrong side,matching the armholes together, pin, then stitch around. Trim and clip the curves. Turn the facing through to reveal the right sides of the fabric by pulling each back through to the front at the shoulder lines. Ease out the armholes and press.
Neaten each of the side seams by either overlocking or zig zag stitching. Open out the side edges of the facing, with the right sides of the fabric together, match the side seam and stitch in one continuous line from the edge of the facing, under the arms and down towards the hem of the dress. Press the seam open, fold and press down the facing inside the dress.
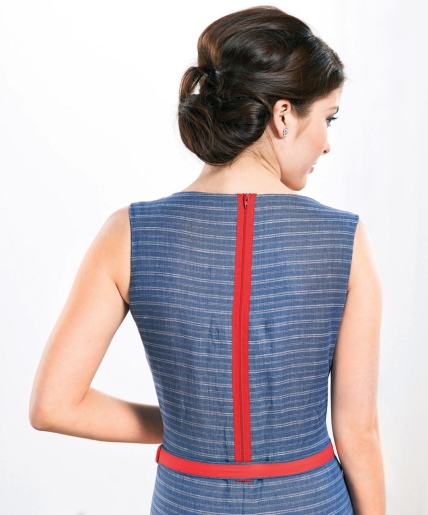
Neaten the edges of the back seam by overlocking or zig zag stitching. Measure the zip and mark this point on the back seam allowance. With the right sides of the fabric together, pin, then stitch as far as the zip notch. Press the seam open, along with the seam allowance within the opening of the zip. Position the zip over the opening onto the right side of the fabric. Pin in place, folding the top of the zip over to the wrong side of the centre top of the neck, and the ends under. Stitch in place, sewing on the fabric edge of the zip.
Fold the contrast fabric strip in half lengthways. Stitch along the length and both ends leaving a gap. Clip the corners and turn to the right side, tease out the corners and press. Match the two ends to the base of the centre back seam, then pin to the base of the dress with the right sides of the fabric facing each other. Stitch around the hem, then neaten the seam by overlocking or zig zag stitching. Press the seam allowance up into the dress.
To make a matching belt, cut a strip of buckram long enough to fit around your waist comfortably plus 20cm, and wide enough to fit through a buckle. Cut a strip of fabric that is double the width of the buckram and slightly longer. Place the buckram in the centre on the wrong side of the strip. Wrap the fabric around, then press, adhering the fabric to it. Position and pin a length of ribbon onto the front of the belt. Edge stitch on the right side to attach.
Thread the buckle onto one end, make a hole for the prong, then turn the raw end under. Stitch across to attach the buckle. Insert an eyelet at your waist measurement, then fix one either side. Finally, make a belt carrier from a scrap of the ribbon.
To make a tunic top
Download the pattern pieces at www.sewmag.co.uk, print and piece together, then use to cut the pieces from fabric. Mark the dots at the points of the darts on the front piece; match the notches at the ends of the darts, pin, then stitch. Press the resulting flaps towards the top of the piece.
Match the shoulder seams, pin, then stitch together. Overlock or zig zag stitch the shoulders seam allowance together, press up towards the back. To bind the neckline you can use either shop bought binding or make your own (see overleaf). Slot the finished, folded binding over the cut curved edge of the neckline, then edge stitch in place.
To attach the breast pocket for the three quarter length sleeved tunic, slot a length of folded bias binding over the top of the pocket and stitch in place.Fold and press 1cm along the three remaining edges. Pin the pocket to the top of the tunic using the dots on the pattern piece as a guide and edge stitch in place. Neaten each of the side seams by either overlocking or zig zag stitching. Match the edges together and stitch.
To make the pocket flaps for the short sleeved top, first line the pieces with interfacing. Fold the fabric in half and stitch along the length and both ends leaving a gap. Clip the corners and turn to the right side, tease out the corners and press. Neaten the raw edges by overlocking or zig zag stitching. Sew the flaps to the front of the top at the points marked on the pattern, fold over and press. Attach two contrasting buttons at either end of the pocket, sewing through all layers.
Neaten the edges of the underarm sleeve seams, pin, then stitch them together. Press the seams open. Match, pin and stitch together the two shorter ends of the cuff facing. Line up the seams of the cuff facing and the underarm seams, pin, then stitch around the base of the sleeve. Fold up and press in 1cm around the top of the cuff facing. Pin to the sleeve, then edge stitch in place.
For the three quarter length sleeved tunic, sew a 20cm length of bias binding together, then fold in half and stitch to make an arrow head. Sandwich the ends between the sleeve and the sleeve facing and stitch in place. Turn the cuff of the sleeve up twice and sew a button to the corresponding point of the arrow head of the binding to secure the cuff in place.
Work a row of gathering stitches around the head of the sleeve starting from the front notch and finishing at the back notches. Pull the threads up slightly, then place the sleeve into the armhole of the tunic. Match the side seams and the underarm seam of the sleeve together; and the notch in the centre of the sleeve to the shoulder seam, then adjust the gathers to fit the armhole of the tunic. When you are happy, pin, then machine stitch in place. Neaten the seam by overlocking or zig zag stitching.
Neaten the edges of the back seam by overlocking or zig zag stitching. Measure the zip and mark this point on the back seam allowance. With the right sides of the fabric together, pin, then stitch as far as the zip notch. Press the seam open, also pressing the seam allowance within the opening of the zip. Position the zip over the opening onto the right side of the fabric. Pin in place, folding the top over to the wrong side of the centre top of the neck and folding the ends under. Sew in place, stitching on the fabric edge of the zip.
Neaten the base of the hem of the short sleeved tunic by overlocking or zig zag stitching. Fold back the base of the 3cm hem, then machine blind hem or hand hem in place. To attach the contrast fabric to the hem of the three quarter length sleeved tunic, stitch the two narrow ends of the contrast strip together and press the seam open, then fold and press in half lenthways. Match the seam of the tube to the centre back seam, then pin to the base of the tunic with the right sides facing. Stitch around the hem, neatening the seam by overlocking or zig zag stitching. Press the seam allowance up into the tunic.


