Sewing Pattern
Embellished pouch set
Accessories
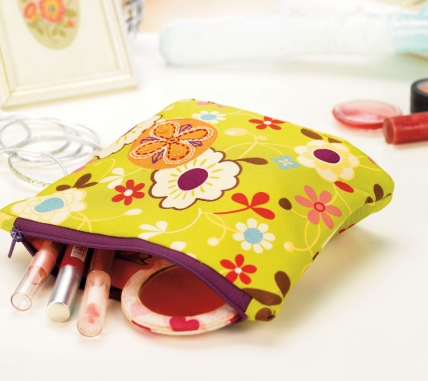
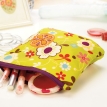
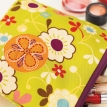
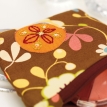
Use colourful cotton, reverse appliqué and embroidery to make a set of cosmetics pouches. Combine different techniques to make a pair of on-trend cosmetics purses. Design your own needlework motifs and embroider them onto retro-inspired fabrics to complete a unique and practical set to be proud of.
Essentials
- Fabric: cotton, Moda Free Bird in 'Grass'and 'Nest'; plain orange cotton, 25cm of each
- Fusible webbing: 25cm
- Embroidery thread, dark red, green, cream, purple
- Zips; purple, 20cm; brown, 15cm
- Embroidery needle
- Tailor's chalk
Dimensions List
- Large purse: 16cm x 19cm
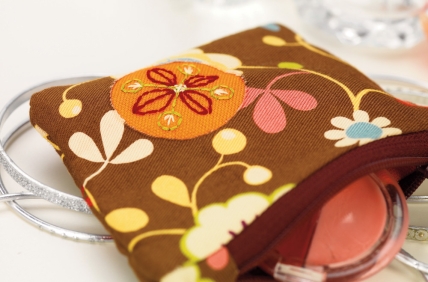
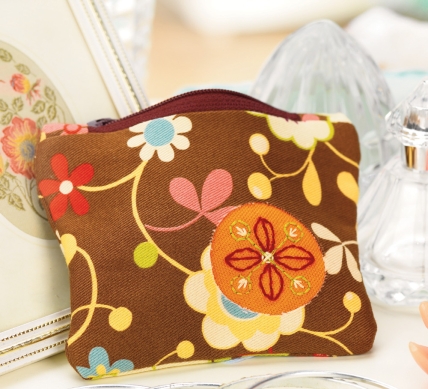
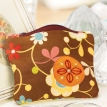
- Small purse: 9.5cm x 12cm
Make a Large Purse
Cut two 17cm x 22cm rectangles from both the green print cotton and the plain orange cotton. Also cut one 8cm x 22cm piece and two 4cm square pieces from each fabric. Lay out the 20cm purple zip and make a mark with tailor’s chalk 16cm along it. Take the two small squares of printed fabric and fold one edge of each over by 1cm, with right sides facing out, and press.
Lay the purple zip flat and line the folded edge of one of the 4cm squares up with one of the marks made on the zip, with the short flap facing up and the raw ends facing into the middle of the zip and pin. Repeat at the other end of the zip with the second 4cm square of patterned fabric.
Lay out the 4cm orange squares and repeat step two on the back of the zip. Pin them into place. Unfold the flaps on all four pieces, pin down flat and stitch along the fold, making sure the pull tab is in the middle of the zip. Fold all the larger flaps over towards the ends of the zip and press.
Take one of the 17cm x 22cm pieces of orange fabric and lay it on a work surface with the longest edge horizontal. Lay the zip, right side up, on top of it and line the edge of the squares up with the top edge of the fabric. Lay the 17cm x 22cm patterned fabric on top, right side facing down, and align with the orange fabric.
Pin along the top edge. Stitch along it, leaving a 1cm seam allowance – the zip will need to be moved out of the way once it’s reached. Fold both pieces of fabric over and press along the seam. Repeat on the other side with the other two large pieces of patterned and plain fabric. Trim the ends of the zip to 1cm.
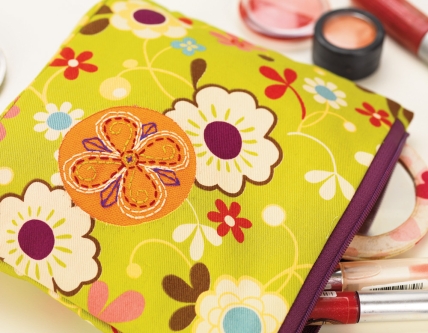
Decide which side will be at the front. Cut a piece of fusible webbing to half the size of the front piece and iron it to the wrong side of the front piece on the left-hand side. Before the backing is removed, draw a 6cm circle, 6cm in from the bottom and left edges, and cut it out. Remove the backing.
Cut a square of orange fabric and mark a 6cm circle on it with chalk. Embroider a motif onto it using the photos for guidance. Trim the fabric, leaving 2cm around the edge of the circle. Brush the chalk off. Place the embroidered fabric behind the hole cut in the part-assembled bag and iron into place.
Add An Internal Pocket
Cut an 8cm x 12cm piece of patterned fabric. Fold over one of the long edges by 1cm and press. Stitch it down. Fold the other edges over by 1cm, pin and press. Pin the patch to the orange lining of the bag and stitch it down. Lie the bag out flat with the orange fabric facing up.
Take the last remaining piece of orange fabric and line it up with the long raw edge at the bottom. Pin and stitch along the edge, leaving a 1cm seam allowance. Line up the two remaining long raw edges of the orange fabric, pin, and stitch along the edge, leaving a 1cm seam allowance. Turn the bag so the front piece is facing up.
Take the last remaining piece of patterned fabric, and line it up along the bottom of the front piece. Pin, and stitch along the edge, leaving a 1cm seam allowance. Take the other long raw edge and line it up face to face with the raw edge of the back piece. Pin, and stitch along the edge, leaving a 1cm seam allowance.
Trim the edges that were just stitched. Turn the patterned fabric inside the orange fabric so that the orange lining is facing outwards. Pin the edges and stitch up 1cm from the edge. Trim the edges and corners, and turn the bag the right way out. Push the base inside the bag and put a couple of stitches in to secure it.
Stitch a Small Purse
From the brown printed and plain orange cottons, cut the relevant pattern pieces using the template on page XX. Also cut two 4cm square pieces from each. Lay out the 15cm brown zip and make a mark with tailor’s chalk 6cm along it. Lay out the two 4cm squares of printed fabric and on each of them fold one edge over by 1cm with right sides facing out, and press.
Lay the zip flat on a work surface and line the folded edge of one of the squares up with one of the marks made on the zip, with the short flap facing up and the raw ends facing into the middle of the zip and pin. Repeat at the other end of the zip with the second square of patterned fabric.
Lay out the 4cm orange squares and repeat step two on the back of the zip. Pin them in place. Unfold the flaps on all four pieces, pin down flat, and stitch along the fold, making sure the pull tab is in the of the middle of the zip. Fold all the larger flaps over towards the ends of the zip and press.
Take one of the large pieces of orange fabric and lay it out with the longest edge at the bottom. Lay the zip, right side up, on top of it and line the edge of the squares up with the top edge of the fabric. Lie the patterned fabric on top, right side facing down, and line it up with the orange fabric.
Pin along the top edge. Stitch along it, leaving a 1cm seam allowance. Move the zip once it is reached as it is impossible to sew past. Fold both pieces of fabric over and press along the seam. Repeat on the second side with the other two large pieces of patterned and plain fabric. Trim the ends of the zip to 1cm.
Decide which side will become the front. Cut a piece of fusible webbing to half the size of the front piece and iron it to the back of the front piece, positioned towards the left. Before the backing is removed, draw a 4cm circle, 2.5cm from the bottom and left edges, and cut it out. Remove the backing.
Cut a square of orange fabric and mark a 4cm circle on it with chalk. Embroider a motif onto it using the photos for guidance, or come up with your own motif. Trim the fabric, leaving 2cm around the edge of the circle. Brush the chalk off. Place the embroidered fabric behind the hole cut in the partassembled bag and iron in place once.
Line the bottom edges of the orange fabric up, pin, and stitch leaving a 1cm seam allowance. Line the patterned fabric up face to face, pin along the long edge and stitch 1cm from the edge. Trim the edges.
Turn the patterned fabric inside the orange fabric so that the orange lining is facing outwards. Pin the edges and stitch up 1cm from the edge. Trim the edges and corners, and turn the bag right sides out.


