Sewing Pattern
Summertime Separates
Dresses Garments Sew Plus
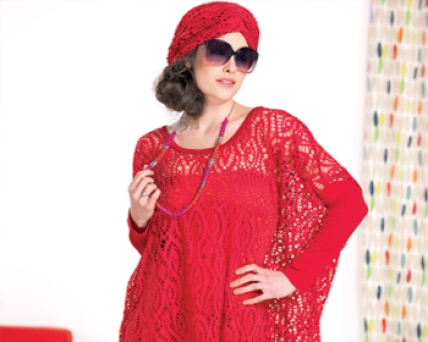
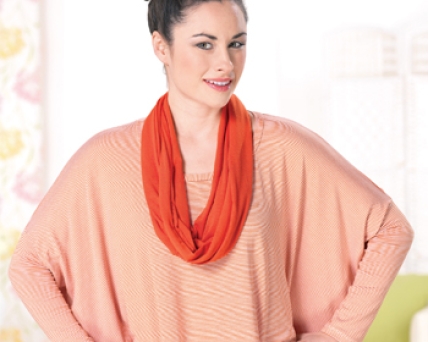
These easy-to-make garments are created from simple squares and rectangles of fabric, cunningly stitched together to form comfortable, stylish clothes. There are two styles of bat wing tops, a looped jersey scarf and custom-length skirt to choose from – mix and match the items to create your own style. You could even pull the longer skirt up and wear it as a comfy bandeau dress – the choice is yours!
Essentials
CUTTING GUIDE:
Long red top
Cut two 95cm squares from main fabric (front and back top)
Cut two 23cm x 36cm rectangles from jersey (sleeves)
Cut one 4cm x 64cm strip from jersey (neckline strip)
Short striped top
Cut two 58cm x 95cm rectangles (front and back top)
Cut two 23cm x 36cm rectangles (sleeves)
Cut a 4cm x 64cm strip (neckline strip) Scarf
Cut a 32cm x 180cm rectangle Long skirt
Cut a rectangle measuring (your hip measurement) x 100cm
Medium skirt
Cut a rectangle measuring (your hip measurement) x 90cm
Short skirt
Cut a rectangle measuring (your hip measurement) x 50cm
make a long red top
Create the necklines. To do this, take one of the large squares of fabric and fold it in half along the grain. Locate the Front Neckline template on this website and place it at the top of the fold line. Pin into place and then cut out the curve. Repeat the process using the back neckline template on the remaining fabric square.
Remove the templates and unfold the front and back top pieces. Place the pieces with right sides together, matching the edges of the necklines. Measure 25cm from the outer edge of the neckline, along the shoulder seam, and place a pin at this point. Repeat on the opposite side. Continue to pin in towards the neckline and stitch the seams together along the pinned section.
Stitch the two ends of the neckline strip together to make a circle, with right sides facing. Fold the strip in half lengthways, matching the raw edges together with the wrong sides of the fabric facing. Mark the centre of the back and front necklines, then pin the join in the neckline strip to the centre of the back neckline.
Pin the strip to the right side of the garment. Find the centre of the strip, then match and pin it to the marked centre front of the neckline. Pin the remainder of the strip into place, easing the neckline evenly onto it. Machine stitch to secure.
Attach the sleeves to the top. Pin one of the narrow ends of the sleeve rectangles into the opening left at the ends of the shoulder seam. When even, stitch into place, and repeat the process onto the opposite side of the top.
Stitch the sleeve seams and the sides of the top together. Match the end of the sleeves and the point at which the sleeves attach to the top and stitch together with right sides facing, working down the entirety of the seam to the bottom edge of the top.
Stitch a hem into the base of the top and the sleeves. Neaten them first by overlocking or working a zig zag stitch. Fold and press in by 3cm. If you own a machine with a blind hem stitch, use this to sew the edge and base of the sleeves, otherwise hand stitch the hem into place with a hemming or herringbone stitch. If you have used a lace fabric to create your top, add a further strip of fabric around the bottom edge and hem, to bind the edges.
create a loop scarf
Cut the fabric as indicated in the cutting guide. Fold the strip of fabric in half lengthways with the right sides facing, and stitch together leaving a 5cm gap in the seam, near to one end. Turn the strip (which should have become a tube), to the right side.
Pull the short (raw) end of the scarf that is closest to the gap in the seam through it slightly. Feed the other end of the tube back into the turned end and out through the gap as well, making sure that the strip isn’t twisted. Match the ends of the seam lines together and pin into place, then stitch around the circle to seal the tube end. Pull the ends back to the right side through the gap, to form a circle scarf. Hand slip stitch the gap closed to finish.
stitch a skirt
Cut a rectangle of jersey fabric to your desired size, following the instructions in the cutting guide. Fold the fabric in half lengthways and match the two long edges with right sides together; pin into place then machine stitch to create the back seam.
Neaten the top of the skirt by overlocking or zig zagging. Fold and press in 3.5cm to the wrong side. Using a machine stretch stitch, work around and on top of the overlocking or zig zagging to create a channel, leaving a gap at the back of the skirt.
Trim a length of elastic to your waist measurement, then thread through the channel. Overlap the two ends of the elastic slightly and stitch together to secure into a loop. Hand stitch the gap in the channel closed.
Hem the skirt. To do this, first neaten the bottom edge by overlocking or zig zagging, then fold and press in 3cm. Use a blind hem or hand stitch to hem into place and finish.
Make the body of this top in any material you like – but make sure to use stretch fabric for the sleeves to ensure a comfortable fit!
Stockist Information
This Collection is styled with garments and accessories from the following stores:
T.K. Maxx 01923 473 000
Debenhams 0844 561 6161
Marks & Spencer 0845 302 1234
H&M 0207 323 2211
New Look 0500 454 094
Next 0844 844 8000


