We are currently undergoing maintenance and currently you may be unable to login to your account. Please bear with us, this should be resolved shortly.

Sewing Pattern

Bette Dress

Dresses Garments Retro Vintage
fb-big twitter-big email-big pin-big

Long-time readers of Sew may fondly remember our Bette dress from our earliest issue, a gorgeous 50s style frock with a nipped in waist and five panel skirt, sewn in a red polka dot fabric. With our 100th issue upon us, we decided to bring back this blast from the past for those who missed it the first time round - not only does it look great, it also provides the opportunity to try sewing a concealed zip and adding a net underskirt for added fullness.

 Login to download
Essentials
  1. Printed cotton, 1.5m x 2.4m
  2. Net, 3.5m
  3. Matching lining, 50cm x 1.5m
  4. Concealed zip, 51cm
Dimensions List
  1. Sizes 8-16
  2. Cutting guide
  3. 1 Front Bodice, cut two on fold (one becomes lining)
  4. 2 Back Bodice, cut two pairs (one becomes lining)
  5. 3 Front Full Skirt, cut one on fold
  6. 4 Back Full Skirt, cut one pair
  7. 5 Side Full Skirt, cut one pair
  8. 1.5cm seam allowance used except where otherwise stated on pattern.

    1 Download and print the templates, then cut out the pieces. Lay out your fabric as instructed in the cutting layouts provided on the PDF, adhering to all fold lines. From the printed cotton place Pattern Piece 1 (Front Bodice) on the fold and cut out two (one of these will act as lining). Then cut two pairs of Pattern Piece 2 (Back Bodice), again one pair will become the lining. Place Pattern Piece 3 (Front Full Skirt) on the fold, cut one. Next cut one pair of Pattern Piece 4 (Back Full Skirt). These pieces form one front skirt piece and two back skirt pieces. With fabric laid flat, cut one pair of Pattern Piece 5 (Side Full Skirt). With tailor’s chalk, mark on the relevant notches to the wrong side of the fabric.

    2 Fold the net in a rectangle 124cm wide, cut along the fold but leave the two layers together. Cut a 38cm x 135cm rectangle from the lining fabric, this will become the top of the net under skirt.

    3 With wrong side facing and using a straight machine stitch sew the darts in the front bodice and then the back bodice pieces. Once stitched in place, press the darts towards the centre of the garment. Repeat this process to dart the lining pieces.

    4 With right sides facing, align the shoulder seams of the front and back bodice pieces and pin to secure. Using a straight machine stitch join the two pieces together with a 1.5cm seam allowance. Repeat this process for the lining.

    5 Lay the lining on top of the bodice with the right sides of the fabrics facing. Match the necklines together, aligning the shoulder seams and the centre backs and front and pin to secure. Working with a straight machine stitch join together with a 1.5cm seam allowance. Trim away half of the seam allowance and then clip around the curve to allow the piece to lay smooth.

    6 Stay stitch the neckline. This line of stitching gives the neckline a smooth finish and prevents the lining from rolling out to the right side of the garment. Fold the seam allowance towards the lining and then stitch on the right side, as close as you can to the seam line through all three layers and press.

    7 Stitch the armholes; this is achieved in two sections, the front (up to the shoulder seam) and then the back. Place the bodice in front of you with the right side of the fabric towards you. Start by folding in the seam allowance of the bodice and the lining on the corner of the armhole and the front side seam; pin together. Continue working along the armhole matching and pinning the lining and the bodice together until you reach the shoulder seam. Stitch together with a straight machine stitch leaving a 1.5cm seam allowance, trim away the seam allowance and clip the curve. Pull the stitched part of the armhole to the right side again. Next repeat this process starting at the back side seam and armhole corner, stitching up towards the shoulder seam, in line with the previous stitching line. Again trim and clip around the curve before turning back to the right side. Repeat the process to the remaining armhole.

    8 Join the side seams together. The bodice side seams and the lining will be treated as one long seam. With wrong sides outermost match the underarm seams together, folding the seam allowances over onto the lining side of the bodice and pin into place. With a straight machine stitch work a consecutive seam from one end of the main fabric to the other end of the lining, leaving a 1.5cm seam allowance. Press the seam open and press the armholes.

    9 Make up the skirt. With right sides facing, align the side skirt pieces to the front skirt piece, ensuring that all the notches match up and pin into place. Work in a straight machine stitch to join the pieces together. With the right sides facing pin each of the back pieces to its corresponding side piece, ensuring all notches are aligned, and join with a straight machine stitch. Finally, create the back seam by working a straight stitched seam up to the marker for the zip notch.

    10 Work two rows of gathering stitches 1cm apart, just below the top edge within the 1.5cm seam allowance, around the waistline of the skirt. A gathering stitch is the longest stitch length setting on your machine, it allows you to pull the threads through the fabric and create a gather in the material. To do this, draw up the threads, pulling an even tension on both threads, the material will begin to bunch up and create the gathering at the top of the skirt. Measure the base of the bodice, and continue gathering the top of the skirt until it is the same length as the base of the bodice. Ensure the gathers are even by working the ripples of fabric along the thread to the full width of the waistband.

    11 With the right side of the bodice and the right side of the gathered top of the skirt facing, pin the bodice and skirt together. Stitch the skirt to the bodice with a 1.5cm seam allowance using a straight machine stitch. This stitching line should appear just below the second gathering line.

    12 Make up the net underskirt. Stitch a gathering stitch through the centre of the two layers of net and gather until it measures 134cm to correspond to the rectangle of lining fabric. Neaten one of the longer 134cm sides of the rectangle by either zigzag stitching along the edge or overlocking. Fold the lining in half, matching the two shorter edges and stitch the two edges together from the neatened edge upwards, leaving 20cm open at the top of the seam.

    13 Place the gathered area, through the centre of the net, along the neatened edge of the lining, pin and then attach the net to the lining by stitching on top of the gathered line of stitching. Pleat the top of the lining to the same measurement as the waist area of the full skirt. Position and pin the pleated edge along the inside of the waistline and use a straight stitch along the top of the gathered waistline of the skirt to join the two pieces.

    14 Insert the zip. Stitch the concealed zip into the back opening using a zipper foot or a concealed zipper foot. Fold and press the seam allowance along the two sides of the back opening. Open out the seam allowance and with the right side of the fabric facing place the opened zip face down matching the teeth to the crease line in the seam allowance. Pin in place. If you are using a concealed zipper foot then place the teeth of the zip into the groove and as you stitch the foot will uncurl the teeth and the stitching will be placed right alongside the teeth. If you are stitching with a normal zipper foot you will need to uncurl the teeth with your fingertips; stitch to the top of the back seam. It is impossible to stitch to the end of a concealed zip so leave approximately 5cm of the zip base un-stitched. Back stitch and then stitch the other side of the zip in place. Carefully thread the zip pull through to the right side at the top of the back seam and pull up to close.

    15 Fold the seam allowances in along the edges of the bodice lining and lay over the seam allowances of the bodice on the inside around the waist, matching all the seams and darts together; pin and then hand slip stitch along the bodice waist seam and along the sides of the zip.

    16 Overlock or zigzag the base of the hem working around the entire length of the full skirt. Turn 5mm in towards the wrong side and then machine edge stitch all the way around the skirt hem to finish.

fb-big twitter-big email-big pin-big

Other Popular Makes...

Photo Discs

Photo Discs

Children Home makes Quick makes
Dimensions:
XS-XL (8-16)

Mark those magical milestones with our Photo Discs. Mark baby’s progress with the help of these fun circles from Carolyn Letten.…

Hair Clip Dolly

Hair Clip Dolly

Dolls Home makes Quick makes
Dimensions:
XS-XL (8-16)

Organise bows, bands, barrettes and beyond with our Hair Clip Dolly. If your little one loves accessorising with pretty clips, you’ll…

Positive Pants

Positive Pants

Accessories Decorations Home makes Quick makes
Dimensions:
XS-XL (8-16)

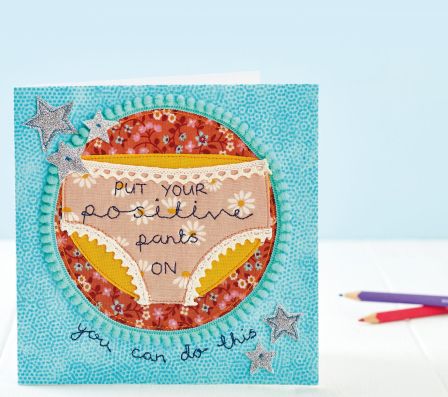
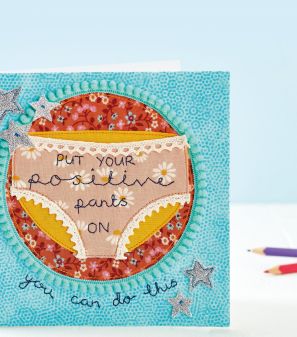
Chin up everyone, it’s time to pull on your Positive Pants. We’ve all been there, in need of some self-belief and a…

Ten in a bed toy

Ten in a bed toy

Home makes Quick makes Toys
Dimensions:
XS-XL (8-16)

Bring a beloved nursery rhyme to life with our Ten in a Bed Toy. Designed by Chloe Hailwood, this fabric…

Sleeping Kitty Cat

Sleeping Kitty Cat

Home makes Quick makes Toys
Dimensions:
XS-XL (8-16)

Decorate your mantlepiece with our sunshine-basking Sleeping Kitty Cat. Cats just love laying in warm spots around the home and…

Hot Air Balloon Quilt

Hot Air Balloon Quilt

Home makes Patchwork & Quilting Quick makes
Dimensions:
XS-XL (8-16)

You’ll be up, up and away with our hot air balloon Patchwork Block Quilt. Ideal for decorating your little one’s bedroom,…

Copyright © Artichoke Media Limited is a registered company number 14769147 in England and Wales
Registered Office Address: Jubilee House, 92 Lincoln Road, Peterborough, Cambridgeshire, United Kingdom, PE1 2SN