Already a member? Click here to Login


Safety Notice: Handmade items made from this pattern may contain small parts or long cords that pose choking or strangulation risks. Not suitable for children under 3 years. Please see the full safety disclaimer at sewmag.co.uk/safety.
The guardsman, in his tall bearskin hat and fire-engine red jacket, is an iconic symbol of Britain, perfect for a simple yet eye-catching cross stitch design. Quick and easy, the motifs are ideal for making cards and gifts for children. Whether you’re stitching a picture, a greeting card, or a tag, each of these projects is sure to inspire a touch of patriotism!
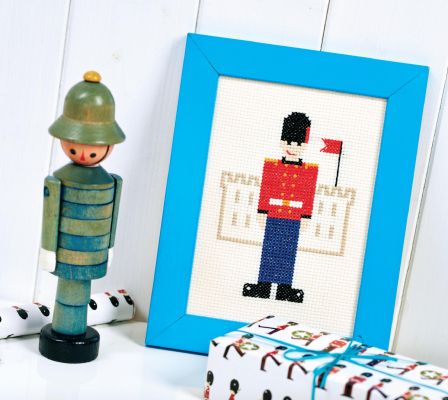
Stitch a soldier picture
Locate and download the charts and cut 11 count Aida fabric to 17.5cm x 22.5cm, or larger if you are using an embroidery hoop. Mark the centre of the fabric.
Thread a blunt-ended tapestry needle with three strands of yellow-gold embroidery thread and follow the soldier and castle chart to stitch the belt buckle, then the buttons. Change to red thread and stitch the jacket, then continue following the chart until the whole design has been worked.
For a neat appearance, make sure that the top and bottom threads on each cross stitch lie in the same direction. Remove the work from the hoop, then press lightly on the reverse, under a damp cloth, to remove any creases.
To frame the picture, cut a piece of card to fit inside the chosen frame, in this case 13cm x 18cm, and place it on the centre back of the embroidery. Trim the fabric, if necessary, to give a border of 3cm all around, then fold it over the edges of the card.
Either glue it together or lace the edges of the fabric together with thread. Remove the glass, then position the embroidery inside and replace the backing board.
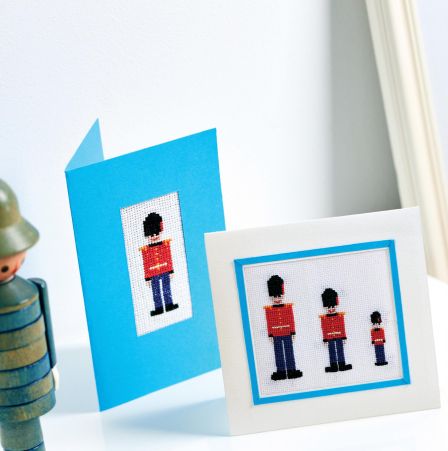
Make a single soldier greeting card
Follow the first stage as per the soldier and castle picture, but use a 14 count Aida fabric measuring 10cm x 15cm, or larger if using a hoop. Embroider as before, using two strands of thread rather than three, to cross stitch the middle soldier from the group.
Continue using the colours indicated in the key until the whole design has been worked. Remove the fabric from the hoop or frame and press on the reverse under a damp cloth to remove creases. Cut blue card measuring 15cm x 20cm and fold in half, then mark out a 4cm x 8cm opening in the front, and cut out neatly using a craft knife.
Trim the fabric to 6cm x 10cm, then place behind the opening, making sure the embroidery is centred. Glue the edges of the fabric on the inside of the card. Cut a piece of card 9.5cm x 14.5cm and stick this on the inside front, to cover the fabric and produce a neat finish.
Create a three soldier card
Follow instructions for the single soldier card, but instead use a 22 count Hardanger fabric measuring 10cm x 15cm and stitch all three soldiers, using two strands of thread. Marking out a central point will help to centre the design when following the chart.
Cut a 12cm x 23cm piece of white card and fold in half, then with the fold at the top, mark out an opening in the front 7.5cm x 8cm, and cut out using a craft knife. Trim fabric to 10cm x 10.5cm, then place behind the aperture, ensuring the embroidery is centred. Glue the edges of the fabric on the inside of the card.
To cover the fabric on the inside front of the card, cut a 9.5cm x 14.5cm piece of card and glue. For a slightly padded effect, place a piece of wadding smaller than the aperture at the back of the cross stitch before glueing down the backing card. For extra detail add a blue border to the front.
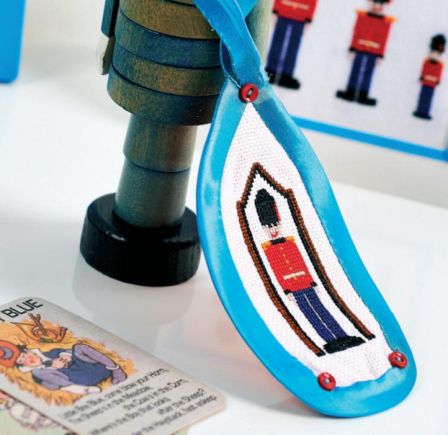
Sew a guardsman gift tag

 Sign in with Facebook
 Sign in with Google