Already a member? Click here to Login


Safety Notice: Handmade items made from this pattern may contain small parts or long cords that pose choking or strangulation risks. Not suitable for children under 3 years. Please see the full safety disclaimer at sewmag.co.uk/safety.
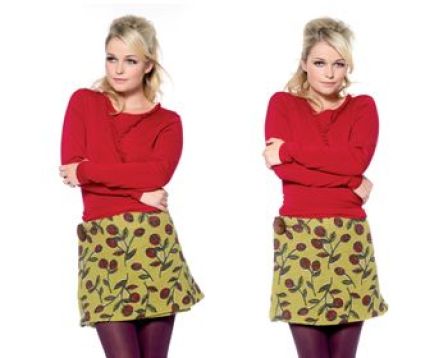
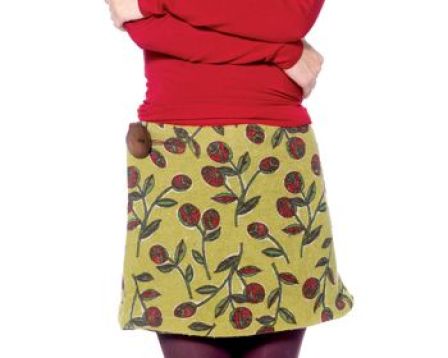
This pretty wraparound a-line skirt is comfortable, customisable and perfectly fitted to your measurements – with only an existing skirt and some newspaper as a template you can create your own self-penned pattern in no time. Use strong petersham ribbon to strengthen your waistband, which teamed with the double-layered front panels will flatten your tummy and flatter your figure in equal amounts!
Wraparound a-line skirt
Make your pattern pieces. To do this, lay out a sheet of newspaper – you should be able to cut one front and one back panel out of each sheet of newsprint (if you can’t, tape two sheets together to accommodate). Place your skirt flat on top of the newspaper sheet (with the front facing upwards) and draw around it.
Gently arc the bottom and top edges downwards to get a close fit on the waistline and a neat hem. Add 1.5cm to the edges and 5cm to the bottom for hem and seam allowances. Turn your skirt over, place it down on the paper again and repeat, so that you have drawn two pattern pieces.
When you are happy with the shape of your templates, use a ruler to check that the sides are the same length, and cut out. Fold the pattern pieces in half to check for symmetry. Hold them up to yourself (or pin them to your clothing) to check the fit, length and style.
Cut three lining pieces. Lay your lining fabric out, folded in half with right sides facing outwards. You need to cut three pieces – to do this, pin one of your templates to the fabric next to the selvedge and cut, then fold the second in half and pin along the fold, to create a third piece.
Prepare the interfacing. Adding this will reinforce the waistline area and add shape to the garment. Lay your interfacing out and place one of your pattern pieces on top. Trace along the waistline edge, then measure 15cm down from the top of the template on each side and mark. Join the two marks (following the curve of the waistline) and cut out. Repeat twice more to create three identical pieces.
Iron the interfacing onto the lining pieces, following the manufacturer’s instructions. Cut three main fabric pieces. To do this, lay your fabric out, folded in half with right sides facing outwards. You need to cut three pieces – to do this, pin one of your templates to the fabric near to the selvedge, then fold the second in half and pin along the fold (as with your lining) to create the third piece.
Trim the lining. Start by trimming the bottom of the lining pieces so that they are 2cm shorter than the main fabric pieces. Pick one of your lining pieces to be the back, and set aside. Take the other two lining pieces (these will now be your front panels) and lay one on top of the other neatly, then pin. Trim a 2cm strip from one side, working from top to bottom with long, straight cuts and unpin.
Neaten the edges. Overlock, or finish with zig zag stitch - this applies to both the main fabric and the lining. Pin the trimmed side panels to either edge of the back piece (one on each side) right sides together, and sew using a straight machine stitch. Press seams open. Repeat for the main fabric to join the three pieces together.
Begin the process of joining the main fabric and lining. You now have two basic skirts, one of main fabric and one of lining. Before attaching them together around the waistband, tidy-up the side panels, which will eventually overlap. To do this, place the two skirts right sides together, and sew along one side edge with a straight machine stitch, working from waistline to hem.
Leave the last 3cm unstitched to allow for turning through later. Because the main fabric is wider than the lining, the fabric will pull around to the inside of the skirt slightly, which will hide the seams on the inner of the garment. Repeat steps 9 and 10 for the opposite side edge of the skirt.
Insert the Petersham ribbon. Place it around the waistline, pinning it onto the lining 1.5cm in from the vertical seam edge and 1.5cm down from the waistline edge. Sew it into place by working a straight machine stitch 2mm in from the top edge of the Petersham, all the way around until you reach the other edge of the skirt, ending 1.5cm from the opposite skirt edge as before.
Sew around the waistband, to attach the lining to the main fabric piece. With right sides together, equal out the fabric at the front edges of the skirt. Pin, then use a straight machine stitch to sew all the way along the top edge of the skirt. Stitch above the Petersham ribbon, as close as possible to the edge.
Turn the skirt right sides out and press. By hand, work a row of small stitches between the outer fabric, Petersham and the lining to catch the three layers together, to make sure they are fixed in place. Hem the lining. To do this, turn it over to the wrong side by 1cm, press, turn over by another 2cm, then neatly machine stitch to secure.
Hem the main skirt. Turn it over to the wrong side by 1cm, press, then turn over by another 3cm. Hand-stitch this hem for extra neatness. Make sure to work tiny stitches, keeping in a straight line, as they will blend with the rest of the skirt and be almost invisible on the right side.

 Sign in with Facebook
 Sign in with Google