Already a member? Click here to Login


Safety Notice: Handmade items made from this pattern may contain small parts or long cords that pose choking or strangulation risks. Not suitable for children under 3 years. Please see the full safety disclaimer at sewmag.co.uk/safety.
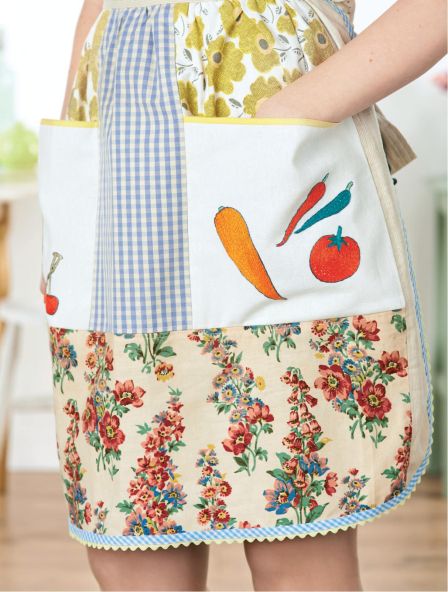
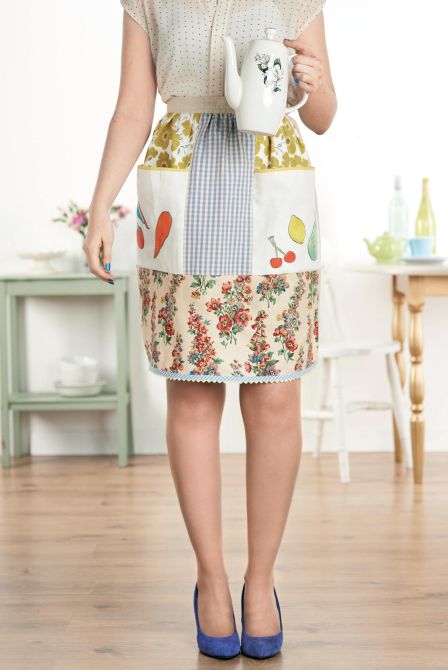
This vintage-style pinny is just the thing for your favourite domestic goddess. Made from a mixture of prints, it has pockets embroidered with fruit and vegetable motifs, cute ric rac edging and long waist straps to tie in a big bow at the back. The stitches used for the embroidery are chain and split stitch, both quick and easy to do. The fabrics can be scraps from your work box, or bits of old linen picked up for next to nothing in charity shops and flea markets.
Make a pinny
Download the fruit and vegetable templates and print out. Mark out a 24cm x 26cm rectangle on white fabric and transfer the motifs, making sure they are not too close to the edges (use the picture of the finished apron as a guide).
Starting with the vegetable design, place the fabric in an embroidery hoop so that the tomato shape is centred within the hoop. Thread your needle with three strands of shade A and fill in the shape of the stem and sepals with split stitch. Thread the needle with three strands of B and outline the shape of the tomato in chain stitch. Work a second row of chain stitch within this outline, and further rows within this, following the contours of the motif until the whole area has been filled in.
Move the fabric within the hoop, if necessary, so that the chillies are in the centre. Using three strands of C, fill in the stems using split stitch, then use shade A to fill in the lower chilli with chain stitch and B for the upper. For the carrot, use shade C for the small piece of stem at the top and shade D to fill in the carrot shape in chain stitch.
Once you have filled in all hoop and fill in the fruit shapes in a similar way to the vegetables, using chain stitch and shade B for the cherries, E for the lemon, and split stitch and shade F for the cherry stems. For the pear, fill in the stem using split stitch and shade F, then outline the main part of the pear using chain stitch and shade C.
Continue working in rows of chain stitch, following the contours of the pear, then change to shade F for the centre of the pear. Outline the fruits and their stems, as before, using two strands of shade G, then add two detached chain stitch ‘pips’ to the centre of the pear and a little cross stitch on the base of the lemon.
Press both pockets lightly on the reverse with a hot iron, then cut out along the lines drawn in step 1. Bind the top edge of each pocket with 1.5cm of yellow bias binding and press.
Place a pocket on a 26cm x 37cm piece of flower print fabric, lining up the bottom and side edges. Pin and tack in place. Stitch 18cm x 37cm checked fabric to each of the side edges of these prepared pieces, with 1.5cm seams; this forms the top part of the pinny.
Sew a different flower print 23cm x 64cm to the bottom edge of this joined piece, with a 1.5cm seam. Join two pieces of 8cm x 56cm striped fabric either side. Press all seams open. As the pinny is unlined, neaten all seams on the back of the work by either binding or overlocking.
Round off the bottom corners of the apron. To do this, simply place a plate or saucer at each side, draw around the edge and cut along this curve. This is because a curved edge is easier and quicker to bind than a right-angled corner.

 Sign in with Facebook
 Sign in with Google