Already a member? Click here to Login


Safety Notice: Handmade items made from this pattern may contain small parts or long cords that pose choking or strangulation risks. Not suitable for children under 3 years. Please see the full safety disclaimer at sewmag.co.uk/safety.
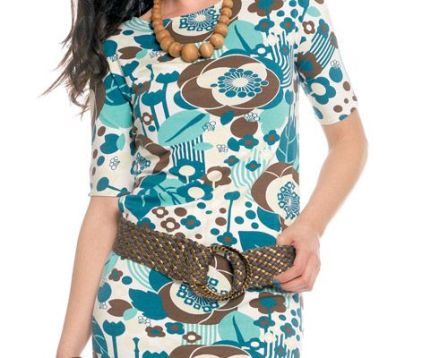
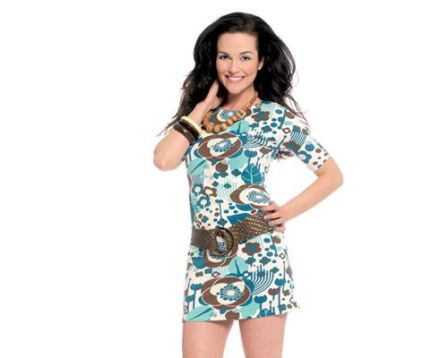
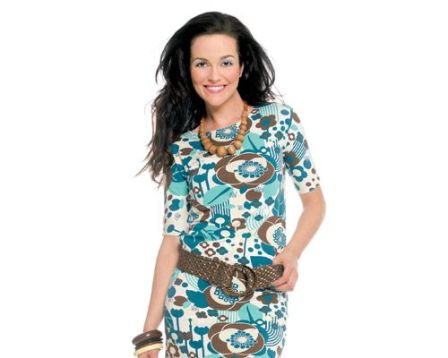
The bodycon dress, that skintight stretch number that we remember from it's heyday in the 80s, has been reworked to give it a fresh new edge for a new generation. This fitted frock has hit the high street with a bang, however the key to wearing this look is to get the fitting just right. And what is the best way to do that? Make it yourself of course! Worked up here in a bold statement print jersey this body skimming garment has been exclusively designed by Vicky Taylor to help you make the most of your curves – and stay on trend!
Make Your Own Bodycon Dress
Fold your stretchy fabric in half, lengthways, right side facing inwards so that you are making a chalk marking on the wrong side of the fabric. Take your close fitting T-shirt (which will form the base your pattern) on and lay it down in the centre of your folded fabric, making sure that it is as smooth, flat and symmetrical as possible. Don’t worry if the garment you are using has been put together in a different way, there are lots of ways of doing things in sewing, and this works too.
Create a template. Draw around the T-shirt adding a 1.5cm seam allowance all the way around, then extend the arms to the edge of the fabric at either side, so that you end up with 3/4-length sleeves. You will also need to square them off at the end, so they aren’t sitting at an odd angle. The best way to do this is to ensure that they are parallel to the original T-shirt and not to the edge of your fabric.
Create the right length. We all have different shaped bodies, so here you can add to or subtract length to suit. You can do this by pinning this on to yourself and marking the suitable length. Remember to add an additional 5cm to accommodate the lower hem.
Check your measurements. Once you have chalked out the pieces use your tape measure to double check that the pieces drawn correspond to your measurements – remembering to include and additional 1.5cm for the seam allowances.
Cut out the pieces. As the fabric is folded in half you will be cutting both the front and back pieces at the same time. Carefully cut around the chalked lines of your pattern pieces; you will now have two identical pieces, one for the dress front and one for the dress back.
Create the neckline. The neckline on the front of the dress will be lower than that of the back. The neckline is created by drawing a smooth arc. A good way to do this is to draw a circle to the desired size on to a piece of paper and fold it in half, this will create a template of a semi-circle that you can draw around to create a symmetrical neck. You can also customise the front neck shaping here to suit your style, creating a deeper arc will make the dress lower cut while a wider semicircle will form a slash-style neckline. Here the arc has been kept fairly narrow and give the appearance of a standard T-shirt neck.
Prepare your pieces. When working with stretch fabrics it is wise to work around the raw edges in a zig zag stitch or overlock them. If you have a stretch stitch function on your machine it is good idea to select it as it is ideal for this material. If you haven’t, adjust your stitch width so it’s set to a slight zig zag and tighten your stitch length. Practise on some off-cuts of the fabric to get it right before starting sewing the garment.
Assemble the dress. With right sides facing align the front and back pieces of the dress and pin in place. This dress is joined simply with four runs of stitches, when sewing try not to pull your fabric, allow it to feed through your machine at its own pace – don’t rush it. While sewing try to ensure that top layer of fabric isn’t being pulled more than the bottom one, or it will pucker and create an uneven finish.
Join the shoulder and upper arm seams. Work from the lower edge of the sleeve up towards the neckline using a straight machine stitch and taking a 1.5cm seam allowance. Repeat for the second side.
Join the side and underarm seams.Working with a 1.5cm seam allowance and beginning at the armhole sew up to the armpit, pivot the fabric 90 degrees with the needle in the down position through the fabric, then continue the stitching line down to the bottom of the dress. Repeat on the second side.

 Sign in with Facebook
 Sign in with Google