Already a member? Click here to Login



Safety Notice: Handmade items made from this pattern may contain small parts or long cords that pose choking or strangulation risks. Not suitable for children under 3 years. Please see the full safety disclaimer at sewmag.co.uk/safety.
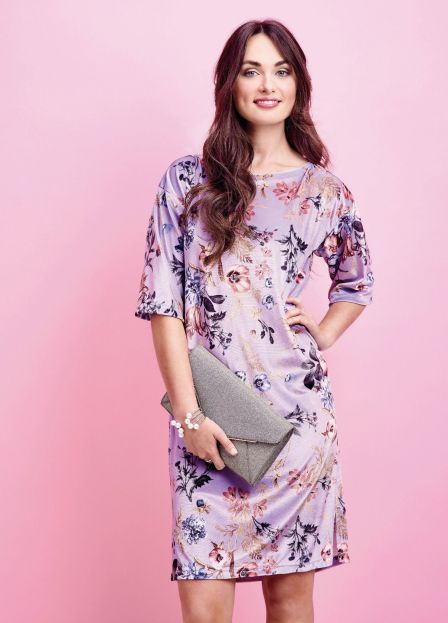
The real wow-factor of this garment, designed by Julia Claridge, lies in the texture and slight sheen of the stretch velvet. It isn’t too tricky to work with, either. Simply finish the raw edges and work in a shallow zig zag throughout.
Cutting Guide
Note: start by taking your bust and hip measurements. The largest of these will be measurement A
Front/back panel: cut two (divide measurement A by four, add 3cm = width) x (desired length* plus 3.5cm) on the fold
Sleeve: cut two 24.5cm x 32cm rectangles
*Side of neck to hem length
1.5cm seam allowance used throughout.
Create a shift dress
1 Cut out all the pieces as indicated in the cutting guide. With the front/back panels folded lengthways, right sides together, measure 13cm in from the fold along the top and mark the side of the neckline on each piece. Measure 3cm, then a further 24.5cm, down from the top along the raw edges, then mark each point for the shoulder and armhole. Mark 12cm from the bottom of each raw edge for the side vents.
2 On the back panel fold, mark 1.5cm down from the top edge. Use a curved ruler to draw to the side of the neckline. Repeat on the front, beginning 8.5cm down from the top edge. Cut the neckline on both pieces.
3 Fold a sleeve in half, right sides together. Measure 5cm down the raw edge, then draw a curve from this point to the top of the opposite folded side (see diagram). Mark 18cm out from the cuff fold, then draw a straight line joining this point to the outer edge of the curve (the 5cm point from earlier) to taper the sleeve. Repeat on the second sleeve and cut both.
4 Neaten the raw edges at the shoulder and side seams, then pin the front and back pieces right sides together and stitch each shoulder seam. Turn right sides out, pin bias binding around the neckline, matching the raw edges, then stitch along the binding’s fold line and turn it inside the dress. Pin in place, then edgestitch around.

 Sign in with Facebook
 Sign in with Google