Already a member? Click here to Login
Safety Notice: Handmade items made from this pattern may contain small parts or long cords that pose choking or strangulation risks. Not suitable for children under 3 years. Please see the full safety disclaimer at sewmag.co.uk/safety.
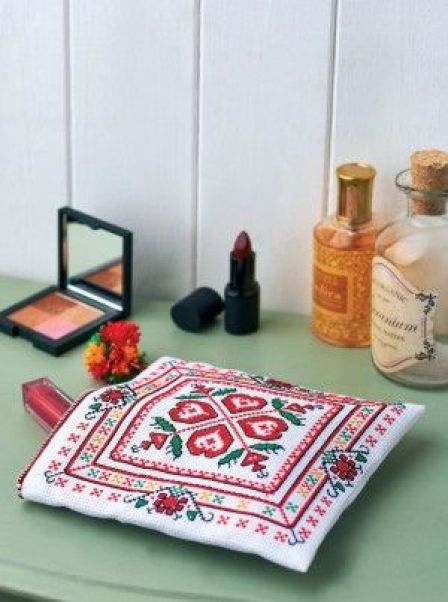
Examples of cross stitch worked on evenweave fabric can be found all over the world. What distinguishes Bulgarian cross stitch is its floral or geometric patterns, the predominance of red thread and the use of back stitch to outline shapes and add fine detail. Bulgarian embroidery became fashionable in Western Europe in the late nineteenth century, with traditional patterns being adapted to appeal to amateur embroiderers. This design may not be finished in an evening, but it's much easier than it looks!
Stitch a purse
1 Stretch aida across an embroidery hoop, then thread a tapestry needle with two strands of red thread, approximately 140cm long. Download the chart from the template pack for Sew January 2015 (click button above).
2 Find the centre of the fabric and mark it with a pin or a small stitch. Bring your needle up in the centre, remembering to secure the end. Remove the pin or unpick the stitch.
3 Start embroidering the design working from the centre outwards. You may find it easiest to work all the cross stitches in an area, or for the entire work, and then add the outlines in back stitch.
4 When you have finished the embroidery, trim the aida so that it measures 20.5cm x 38cm, with the embroidery centred. With right sides facing, join the two short ends with a 1.5cm seam, forming a tube. Flatten the fabric with the seam positioned at the centre back so that the embroidered area will be the front.
5 Stitch the base of the bag with a 1.5cm seam. Trim the seams and clip the corners. Turn the top edge to the wrong side by 1.5cm and insert a zip in the gap. Pin, tack and stitch in place.

 Sign in with Facebook
 Sign in with Google