Sewing Pattern
Floral Liberty Print Blouse
Dresses Garments
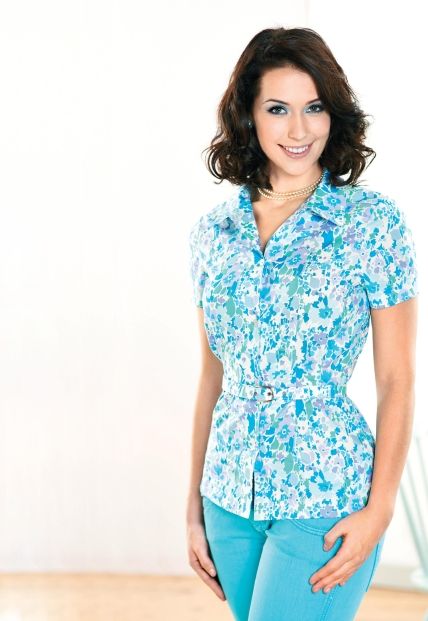
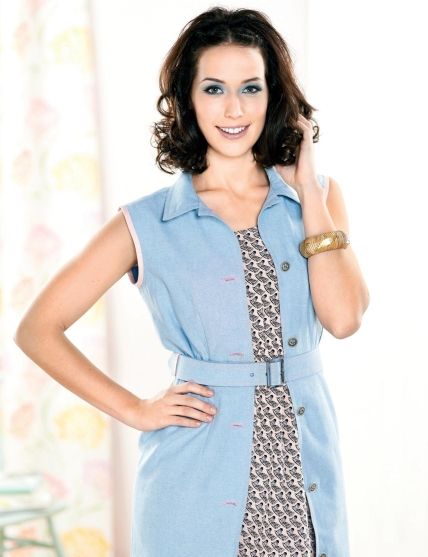
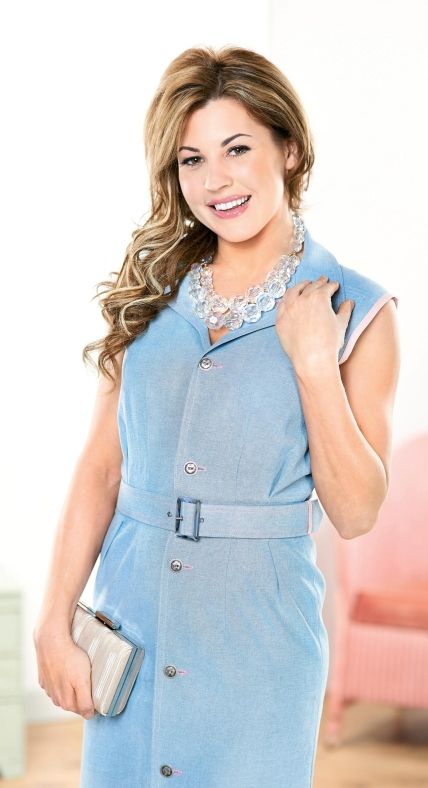
Our beautiful, lightweight blouse is perfect for spring with its short sleeves and fresh floral print from Liberty’s Bloomsbury collection. The pattern can also be easily adapted to create a sleeveless shirt dress in soft denim with contrasting binding. Both feature a coordinating belt to accentuate your waist and can be worn as casual attire or as part of a mood-lifting work ensemble.
Essentials
- Fabric: printed, Liberty, 120m; denim, 150m, 150cm wide
- Iron on interfacing, lightweight
- Bias binding, contrasting
- Buckle
- Buckram, curtain, adhesive
- Eyelets
- Thread, matching
- Buttons: pearlescent, small, five; metal, medium, six
Cutting Guide
- Front shirt: fabric, cut one pair; interfacing, cut one pair of front facings
- Back shirt: fabric, cut one on fold
- Sleeve: fabric, cut one pair
- Collar: fabric, cut one pair; interfacing, cut one
- 1.5cm seam allowances are used throughout
Dimensions List
- Sizes 8-10, 12-14
Stitch a blouse
Download the templates and print. Cut out all the pieces following the cutting guide and mark the dots of the darts on the front and back pieces of the shirt; match the dots at the centre of the darts, pin, then stitch up to the dots at the top and base of each. Press the front darts towards the centre front of the shirt and the back darts towards the centre back. Make the tucks on the front shirt in the same way.
Match the shoulder seams together, pin, then stitch together. Overlock or zig zag stitch the shoulders seam allowance together, press this up towards the top and then top edge stitch on the right side. Iron on the interlining to the front facings and then neaten the edge by overlocking or zig zag stitching.
Iron interfacing to one of the collars. With the right sides of the fabric facing, pin and stitch the collar pieces together. Trim the bulk from the corners; turn to the right side, press, then top edge stitch on the right side of the collar. Pin the collar to the neck of the shirt, attaching just the under layer to the neck, clip into the curve of the neck to enable it to fit. The base corners of the collar should be matched to the centre front lines on the shirt fronts; stitch in place.
Press the front facings by folding and pressing along the lines indicated on the pattern. Unfold the facing at the top of each piece, back onto the right side of the collar, then stitch from the fold as far as the shoulder seams. Clip into the seam allowance level with the shoulder seam as far as the stitching, trim away the bulk and turn the facing to the right side and press. The raw edges of the neck should be poking out from the top of the folded front facings. Fold the raw edges of the neck up into the collar, fold in the seam allowance of the top collar, pin, then edge stitch or hand slip stitch the inner edge of the collar, sandwiching all the raw edges inside. Neaten each of the side seams by either overlocking or zig zag stitching. Match the edges together and sew as far as the top slit. Press the seam open. Neaten the edges of the seams, pin, then stitch the seams together. Press open.
Neaten around the base of the sleeves. Press up the hem, pin, then machine stitch in place. Sew a row of gathering stitch around the head of the sleeve, starting from the front notch and finishing at the back notch. Pull the threads up slightly, then place the sleeve into the armhole of the shirt. Match the side seams and the underarm seam of the sleeve together; match the notch in the centre of the sleeve to the notch at the shoulder and adjust the gathers to fit the armhole of the shirt. When you are happy, pin, then machine stitch in place. Neaten the seam by overlocking or zig zag stitching.
Neaten the base of the shirt in the same way. Fold back the base of the front facings, machine stitch across each along the 3cm hem line, then turn back to the right side and press. Turn up and press the remainder of the 3cm hem. Machine stitch the hem and around the two slits in the side seams.
Make five buttonholes on the right-hand side vertically down the centre front line of the shirt as indicated on the pattern; working from the top, with four more equally spaced. Make the buttonholes to fit the size of your buttons, then stitch five in corresponding places onto the left side of the shirt.
To make the belt, cut a strip of buckram long enough to fit around your waist comfortably and add another 20cm. It should be wide enough to fit through the buckle. Trim the end to an arrow shape. Cut a strip of fabric that is double the width of the buckram and slightly longer. Place the buckram in the centre on the wrong side of the fabric strip. Wrap the material around the buckram and press, adhering the fabric to it.
Cut another strip of fabric 2cm wider than the belt, fold and press 1cm around the edges. Position and pin this strip onto the back of the belt, then edge stitch on the right side. Thread the buckle onto the blunt end, make a hole for the prong, then turn the raw end back onto the belt. Turn the raw end under and stitch across, attaching the buckle. Fix an eyelet to your waist measurement and one either side. Finally, make a belt carrier from a scrap of the fabric.
Sew a shirt dress
- Adjust the pattern by extending the vertical lines down to the desired length of the dress, making sure you have allowed for the hem. Follow the instruction for the shirt, using denim fabric and omitting the sleeve instructions. The armholes are bound with bias binding. Press the binding in half and slot over the raw edge of the armholes. Edge stitch in place. Make a double row of top stitch where indicated in the shirt instructions and a double row around the hem. Make six horizontal buttonholes and sew metal buttons in the corresponding places on the left side of the dress.
