Sewing Pattern
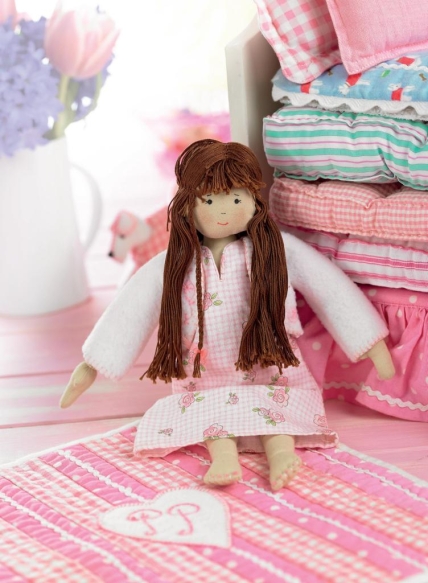
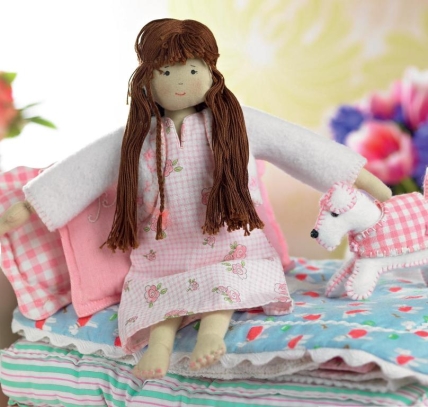
Princess doll and her puppy
Toys
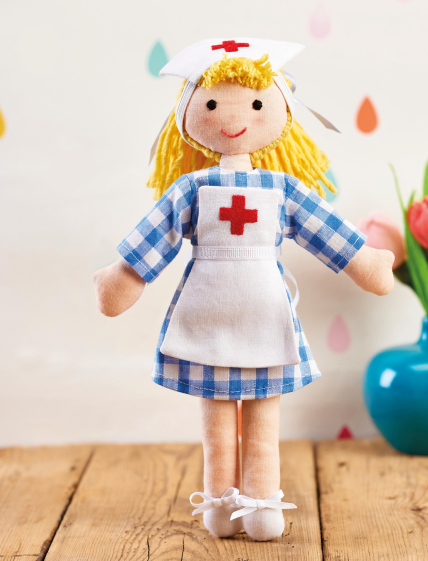
Inspired by the classic story of the Princess and the Pea, this delightful dolly and adorable puppy are the ultimate playmates. They're easier to sew than you might think, and impressive too, making them an excellent choice for beginners and family craft sessions. To complete the look, why not whip up some super-soft bedding and pillows for the princess to sleep on?
Essentials
- Fabric: calico, tea dyed, 22.5cm x 50cm; cotton, 25cm x 50cm ; fleece/felt, 10cm x 25cm; scraps of printed cotton for clothing
- Embroidery thread, fine, brown
- Safety toy stuffing
- Sewing kit
- Markers, permanent
Princess pearl
Trace body pattern templates onto paper. Stick onto card and cut out. Using a fine pencil, mark the arms twice and the body and head once onto the wrong side of calico. Leave 1cm between all pattern pieces: do not cut.
Place two pieces of calico together with the markings uppermost and sew on the marked line. Leave openings where indicated. Note that on the head you will be sewing all the way around, leaving no gaps. Once sewn, cut the pieces out with a scant 0.5cm seam allowance. Turn the body, legs and arms right side out. Stuff the body and neck firmly. Sew closed the opening. Stuff arms half way up to the elbows.
Sew the arms to the top of the body; the arms must be sewn on neatly. Cut a slit in the top third of the back of the head through one layer only. Turn right side out and stuff very firmly making sure there are no wrinkles on the chin! Stitch the opening closed.
Draw on the features. Sew the head onto the neck, and give her a coy little tilt of the head. Wrap the thread around her waist, ankles and wrist to define the body shape, then cast off. Use matching thread to sew in her toes using large stitch right through to the back of her foot.
Dolly hair
To make the hair, wrap brown cotton around the tall side of a large book. Make a cut through all strands to give a lovely chunk of hair. Save three long strands for sewing. Remove one third of the chunk of hair and cut 7cm off the end for the fringe. The remaining hair will go to the back of the head.
Draw a fine line across the right side of the top of the head, 0.5cm down from the seam. Place the 7cm strands of hair along this line, making sure the line is in the middle of the strands. Sew with a back stitch through the middle of the strands along the line onto the head. Fold the other half of hair down to give a full fringe. Comb straight. It sometimes helps to put a rubber band around the fringe to keep it neat whilst you sew the remaining hair on. Take a scrap of paper and draw on a 5cm line in pencil.
Position the remaining strands along this line, making sure they are in the centre. You will have a chunk of hair that is shorter than the rest, place this on end. Spread it along the line. Using a sewing machine with a small stitch and brown thread, sew over the hair along the line. You may need to bunch the hair up to keep it within the line, this always works well, so do not worry. Tear off the paper.
Place the hair onto the doll’s head. The shorter lengths of hair should be at the back. Overlap the fringe by 0.5cm and pin in place. Pin the hair at the back of the head just above the neck. Sew by hand, using a back stitch, through to the head along the machine sewn line. If you used an elastic band for the fringe, remove it and comb the hair so it looks neat. Sew into place, on each side separately. Start from where the ear might be and aim to finish at the top of the neck. Use a back stitch as before, trim to shape.
Nightie
Fold the piece of fabric in half, and half again, gently press. Place the pattern onto the fabric matching the folds and cut out. Open out the nightie. Place the right side of the interfacing oval on to the right side of the nightie in the centre.
Cut out the small paper pattern neck opening, place it in the centre of the interfacing and draw around the outside edge of the shape. Using tiny stitches, sew on this line all the way around. Take a small pair of scissors and cut away the opening, snipping into the points.
Tuck the interfacing into the opening made and voilà you have a great little neck opening hem the sleeve and bottom of the dress. Fold the dress right sides together and sew the two sides and arm seams, snip under the arm, turn the right way out. Press.
Pants
- Using the template, cut out the knickers being careful to place the pattern on the fold. Open out the shape, place the pants wrong sides together and sew the two side seams. Turn the top over and sew a row of running stitches around the waist, fasten off tight once they are on the doll. Repeat for the bottom hem of the pants legs.
Bed jacket
Fold a 25cm square of felt in half and then in half again. Place the jacket template on top of the felt, matching the folds, cut out. Open out the felt jacket and re-cut the two front sides using the template as a guide. Sew the under arm seams. Decorate the edges with blanket stitch.
Pink pup
1 Cut out the pattern pieces from your fabric. You will need two of the body and just one for the gusset. Pin the two body pieces wrong sides together and with a blanket. Sew from A to B, as marked on the pattern, across the top of the dog.
2 Pin the gusset in place and sew all the way around the legs from A to B. Gently stuff the dog, paying attention to his nose and feet. Sew eyes on right through its head so you create a little eye socket using small beads or working French knots if giving to a younger child. Embroider a nose with a satin stitch.


