Sewing Pattern
Lined Gadget Cases
Accessories
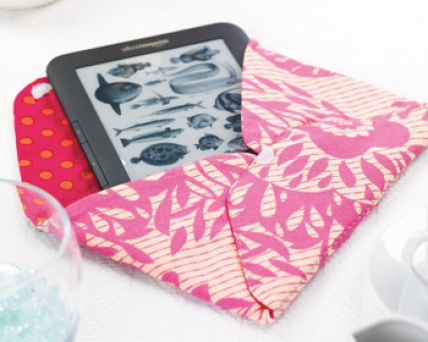
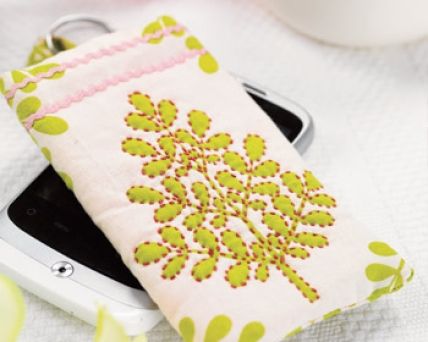
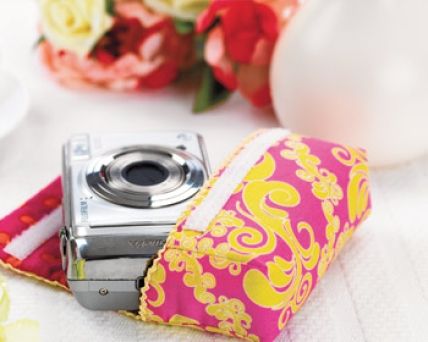
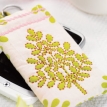
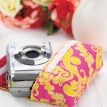
Keep your valuables safe from dust, knocks and scratches with this reinforced and lined set of cases in three styles – envelope, pouch and box case. Durable felt adds strength to the construction of these cases and only small amounts of fabric are used, meaning it's the perfect make for bundles and offcuts. Click here to download the template for this project.
Essentials
- ENVELOPE CASE:
- Fabric: print cotton, 30cm square, two coordinating pieces (one to be used as lining)
- Felt: 30cm square
- Velcro spot, one
- SMALL POUCH:
- Fabric: print cotton, 15cm square, two coordinating pieces (one to be used as lining)
- Wadding: lightweight, 15cm square
- Split ring: large
- BOX CASE:
- Fabric: print cotton, 25cm square, two contrasting pieces (one to be used as lining)
- Felt: 25cm square
- Velcro: tape, 8cm
- FOR ALL:
- Embroidery thread: contrasting shades
- Embroidery needle
- Ric rac braid: narrow, 1m
Dimensions List
- Envelope case: 14cm x 20cm
- Small pouch: 7cm x 12cm
- Box case: 4cm x 7cm 10cm
Make an Envelope Case
Lay out the felt and both cottons and fold them all in half diagonally with right sides together, to make three triangles. Locate the envelope case template on this website and carefully trace it onto each triangle. Place on the fold. Cut out then unfold the pieces and layer together, placing the felt at the base, then the lining right side up, and finally the outer fabric right side down on top on the stack.
Stitch around the edge of the shape, leaving a 6cm gap along one edge for turning through. Clip all of the corners and cut away the excess seam allowance from the felt only - too much material will cause unsightly bulges on the edges of the case.
Turn through the work so the felt is sandwiched between the two pieces of cotton. Ensure all corners and curves are turned through completely and press. Fold in the raw edges of the gap and stitch closed by hand.
Thread an embroidery needle with three strands of contrasting embroidery thread and sew a line of running stitch between the four corners of the shape, to form a rectangle in the centre. This shape will form the creases where the envelope shape will be folded. Fold in the sides of the envelope and pin temporarily in place. Fold up the base of the envelope and tack to the bottom edge of each side.
Use three strands of embroidery thread to sew a line of running stitch from the bottom left corner, up, across the tacking stitches and back down to the bottom right corner, securing the sides and base of the case. Remove the tacks. Pin the ric rac braid around the outside of the top flap of the envelope, 5mm in from the edge, using a running stitch. Sew another line of ric rac across the front of the case, 1.5mm up from the lower fold line.
Sew a Velcro spot to either side of the envelope where the top flap overlaps the bottom one.
For added decoration, use three strands of contrasting thread to quilt the front of the envelope working around any motifs in the fabric in running stitch. Secure the start of the quilting with a double stitch to avoid any knots and only sew through the top fabric and the felt underneath so that no stitching shows inside the case.
Create a Pouch
Measure your phone (or preferred gadget) and note down the measurements. Cut your fabric and wadding pieces 2cm wider than the circumference, and 4cm taller than the height. If using a printed fabric, try to include a large motif in the centre of the outer fabric. Layer the fabrics together – first place the lining fabric with right side down, then the wadding, and finally the outer fabric right side up. Pin together.
Thread a needle with three strands of embroidery thread and quilt through all layers, working around the central motif of the outer fabric with a small running stitch. Fold the quilted panel in half and stitch the back seam on the outer layer of fabric only with a 5mm seam allowance.
Trim away 1cm from each edge of the wadding to cut down on bulk, then fold under 5mm on one side of the lining fabric. Top stitch to the other side, creating a neat inner seam that encloses all the raw edges. Flatten the tube of fabric so that the back seam is centrally positioned and sew along the base in the same way.
Turn the pouch right sides out, using a point turner or pencil to ensure the corners are neat. Trim away 1cm of wadding from the raw top edge. Fold in both cotton fabrics and sew together with slip stitch to make an invisible seam.
Make a strap. Cut a strip of spare fabric measuring 3cm by 12cm and finger press in half lengthways. Open out and fold the raw edges into the middle before folding in half again, to create a bias strip, and top stitch along the seam. Turn under the ends of the strip to neaten.
Place a large split ring onto the strip before stitching the ends to the back of the pouch. Decorate the top edge of the pouch with a double row of mini ric rac in a similar colour to the embroidery thread held in place with small running stitches.
Stitch a Box Case
Lay out the fabrics and fold each in half, with right sides facing outwards. Locate the camera case template on this website and trace onto each piece of fabric. Cut them out, leaving a 1cm seam allowance on all sides, then open out flat.
Layer the fabrics – place the felt first, then the lining right side up on top of that, then finally the outer fabric right side down on top of the lining. Pin together. Stitch around the top flap from point A to point B, then clip the curves and trim away the excess felt. Turn the work out through the flap and press.
Tack the felt to the lining. Bring the four flaps of the fabric together along the side edges and pin, to create a box shape (one side will have an excess of fabric, this will become the flap). Stitch, trim away the excess felt. Do the same for the outer material, then turn this section right side out so the lining will slip inside the box neatly.
Trim away 1cm of felt from the raw edge, turn in the raw edges of both cottons and slip stitch together to make an invisible seam, enclosing the felt. Use a small running stitch to attach a length of mini ric rac around the flap and opening of the case. It helps to insert the camera before doing this as you will then have the opportunity to gather the opening slightly for a snug fit.
Use three strands of embroidery thread to quilt the front flap of the case with small running stitches. Only stitch through the outer layer of cotton and the felt so that no stitches are visible on the inside of the flap. Cut an 8cm strip of Velcro in half lengthways and sew each piece in position to hold the flap closed.
Note: this pattern fits an average compact camera measuring 9.5cm wide, 6.5cm high and 3.5cm deep. If your camera or gadget is of different dimensions you will need to redraw the pattern to accommodate this.


