Sewing Pattern
V&A Peacock Fabric Bag
Accessories
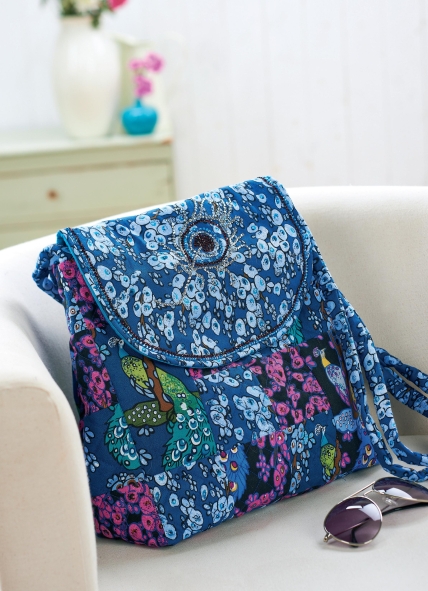
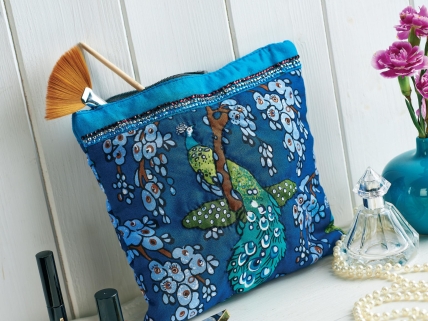
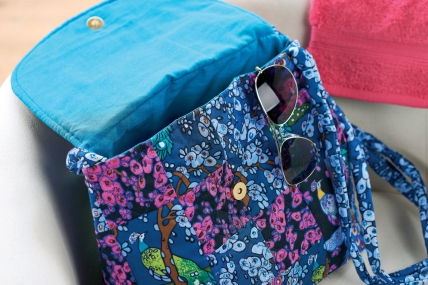
Peacocks are known for their impressive plumage so it’s no wonder we chose the majestic bird as a motif for our statement bag. Combined with richly-coloured V&A fabrics and sparkly hot fix gems, this is a fashion item you’ll want to show off again and again.
Essentials
- Fabric: V&A, Teal Peacock; Teal Tree Blossom; Fuchsia Peacock; Fuchsia Tree Blossom, fat quarter of each; cotton lining, coordinating colour, 50cm; backing fabric, quilt, 50cm
- Wadding, quilt, 2oz Clasp, magnetic Snap fasteners, two Hot fix wand
- Gems, hot fix, glass, 3mm, range of colours
- Templates, card: 8cm square; 8cm x 15cm
- Pencil, chalk
- Loop turner
- Cord (optional)
Dimensions List
- Patchwork bag: 10.2cm square
- Cosmetics bag: 19cm x 20.5cm
Sew a patchwork bag
Use an 8cm x 15cm card template to trace and cut six peacock motifs, three from each colourway. Use an 8cm square template to cut another 44 pieces of fabric, with equal amounts from each design.
Arrange the cut outs into five panels; two sized at 10.2cm square for the front and back, and three sized at 5cm x 10cm for the gussets. Intermingle the peacock motifs throughout the panels and keep the designs the same way up. Sew the cut outs together with a 5mm seam allowance and press.
Choose a large panel for the front of the bag and stitch the gussets to either side and along the base. Add the second square panel to the other side of the base, taking care to invert the design so that when it is folded up to meet the sides of the bag, the motifs will be the same way up as those on the front.
You should end up with a ‘T’ shape. Press this to flatten all seams. Place the quilt backing fabric on a flat surface with the wadding on top. Lay the patchwork face up on the wadding and pin down through all three layers, distributing pins over the surface. Trim the wadding and backing to the same shape as the patchwork.
Machine stitch around the rectangular peacock patches. Add more quilting by stitching diagonally from corner to corner on each square block, avoiding the rectangles. Repeat in the opposite direction to create a cross in the centre of each square.
To stitch a denser quilting pattern, flip the layers over and draw lines centrally between all of the diagonals if desired. Remember to stop and start at the edges of each rectangle. Press the quilted panel then lay face up onto the coordinating lining material, pin, and cut this to the same size.
Fold the back panel of the quilted bag over to meet the front panel, right sides together. Pin and stitch the side gussets to the sides of the back panel. Complete the bag by sewing the base of each gusset to the sides of the bottom one.
Cut several 6cm wide strips of leftover fabric and join end to end to make two straps, each 115cm long. Fold right sides together on the long side and sew 5mm from the edge. Use a loop turner to pull the fabric tubes right side out and press. Thread thick cord through them to fatten if desired.
Tack the ends of the straps to the top edges of the front and back of the bag, matching the raw edges and placing the straps 2cm in from the side seams. Cut a 21cm x 27cm rectangle of leftover fabric and use a side plate to draw curves at the two bottom corners. Trim away the excess fabric. Use this as a template to cut the same shapes from wadding and lining fabric.
Stitch the flat edge of the flap to the top of the bag’s back panel, right sides together, ensuring the strap is laying flush against the bag with the ends included in the seam. Place the shaped lining fabric onto the right side of the flap with the wadding over this. Pin in place and stitch around the curve, starting and stopping where the flap attaches to the bag. Turn out the flap so the wadding is sandwiched between the fabric and lining. Press the curved seam before topstitching around the flap, 5mm in.
Mark the centre of the flap lining, 3cm up from the sewn edge. Fit half a magnetic fastener to the inside by pushing the fixing bars through tiny slits cut in the lining and wadding. Bend the bars flush to the clasp, accessing the back of the fastener through the raw edge of the lining and wadding. Fold the flap over the front of the bag, mark the position of the fastener and fit the other half to the front panel.
Assemble the lining in the same way, then slip over the quilted bag wrong side out. Pin the top edges of the lining to the top edges of the bag, working from one side panel, round the front to the other side panel, lining up seams where possible. Do not pin the back panel because this needs to be kept open for turning. Ensure the front strap is laying flush against the front of the bag before sewing along the top edge, including the ends of the strap in the seam.
Turn out the lining and push inside the quilted bag. Topstitch the seam as before, close the bag and fasten the clasp. Flatten so the side gussets jut out. Fit snap fasteners to each side of the gusset, facing out, so the sides can be tucked in and fastened temporarily for a narrower bag if desired.
Decorate with diamant?
- Download the peacock template. Copy the design onto the flap of the bag using a chalk pencil. Working from the centre out, cover the lines of the design with alternating colours of 3mm hot fix crystals using an applicator. Simply screw the correct size nib into the barrel before turning the tool on, then allow it to heat up on the low setting, taking care not to touch any part of the metal barrel. Arrange crystals on a plate, right side up. Lightly push the nib over the gem, lift it from the plate, watch for the glue on the back to melt, then press quickly against the fabric before removing the tool to leave the gem in place. Continue to add a double row of crystals to the outside edge.


